Thursday, June 30, 2011

S90: Rust Begone

I've been collecting all sorts of rust removal techniques in my notebook as I browse the interwebs and forums.  Thought I'd try the simplest one first: regular old aluminum foil.  This one almost sounded too good to be true, but it was cheap and easy so I figured I may as well see how effective it was before trying anything else.

In short, I now have a brand new respect for this humble, unassuming kitchen drawer product.  It's been upgraded from simple wrapper of leftovers to having a full time position with Team Vintage Honda.

The process is simple.  Use a little patch of foil along with water or WD40.  Rub, wipe clean, repeat as necessary.  I tried it with water first, which worked great.  WD40 seemed to work a little faster, plus it has the benefit of leaving the surface coated, so that's what I kept using.

It's actually a chemical reaction you're looking for, not an abrasive one.  Wikipedia puts it better than I could:

Aluminum foil is used to remove rust from steel and polishes steel surfaces by hand by rubbing it with aluminium foil dipped in water. The aluminium foil is softer than steel, and does not scratch the surface. Heat is generated by rubbing friction, the aluminium oxidizes to produce aluminum oxide.  Aluminium has a higher reduction potential than iron, and therefore leaches oxygen atoms away from any rust on the steel surface. Aluminium oxide is harder than steel, and the microscopic grains of aluminium oxide produced create a fine metal polishing compound that smoothes the steel surface to a bright shine.

The proof is in the pudding, though...  Here are some before and after shots.


Monday, June 27, 2011

CM91: Reattaching the Head

When I first started working on getting the cylinder head off, I was stopped several times by stuck screws or tools I had to go buy.  That led to me disassembling and reassembling the thing several times.  The first time I'd get five steps in and then have to stop.  The next time I'd get eight steps in and then have to stop.  Each time I'd reassemble everything and just start over the next time I worked on it.

I'm realizing now that the repetition was very helpful since you don't pick up on everything the first time around.  With that in mind, I decided to go ahead and get the cylinder head reattached even though I haven't yet cleaned it or gotten the valves or rocker arms out.

Followed Clymer's and everything went back together without a snag.  Though the first time I tried getting the head back on, I found that the cam sprocket wouldn't come out far enough to line up correctly.  I thought the chain was pulled taut, but it had gotten a bit kinked inside the cylinder, so watch out for that.

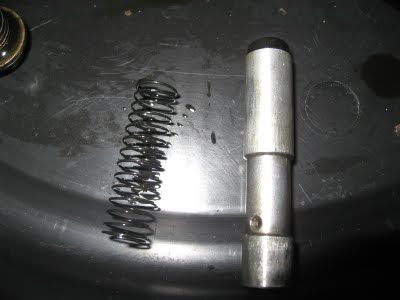
Also, as part of reassembly, you need to remove the cam chain tensioner sealing bolt, followed by the spring and the pushrod (to give the chain the max amount of slack).  Well, I got the bolt off with no problem (and make sure you have something to catch the residual oil) and the spring fell right out behind it.  Then... nothing.  Checked around with my finger and couldn't feel anything inside the hole.  So I just carried on with the other work.  Five minutes later, the pushrod plopped out.  I'm sure there's a trick to get it out a little faster instead of waiting for gravity to do it, so I'll have to ask around on that.

After everything went together, I spun the alternator a few times, and to my surprise and amazement, everything worked!  Found TDC a few times and checked the marks and everything was lining up swimmingly.


Here's a shot of the spring and the pushrod that live under the sealing bolt.

S90: The Seat Must Go

My guiding policy for both these restorations will be to never replace parts that can otherwise be fixed up, repaired, or refurbished.  The whole point of this project is to build up skills, tools and knowledge, not just to replace every rusted part of the bike using eBay and a credit card. 

That being said, the S90's seat is pretty much beyond all hope.  The metal pan has turned into loose layers of rusty sheets.  I think the seat cover and cushion are actually holding the pan together instead of the other way around.
Had to take some good shots of the underside so I can make sure the hardware and bolt holes line up to the eventual replacement.


S90: PB Blaster vs Liquid Wrench, Round One

So I've heard good things about PB Blaster, good things about Liquid Wrench, and great things about Kroil (except for its price).  But the local shops only seem to carry PB Blaster and Liquid Wrench, so I decided to let those two duel it out first.

A couple days ago I sprayed every rusty nut and bolt on the left side of the S90 with PB Blaster, and everything on the right side with Liquid Wrench.

Today was the first test of their effectiveness as I went to remove the seat.  You'll see the bolt in question at the top of the picture below (it's the smaller one).

But Round One turns out to be... a Draw!  Shockingly, I unscrewed the nuts on both sides by hand.  They were so loose I could almost spin them.  I suppose there's a chance that they could have been that loose to begin with, but just looking at their condition I find that very hard to believe.

Instead I'm really hoping that it was the rust eaters doing their job, and doing it very very well.

Friday, June 24, 2011

CM91: Ever Play the Game Operation?

Ok so this is Part II of getting Stymied by two stuck screws on the rocker arm cover.  Ended up stripping them with the Lisle's phillip head, so now it was time to call in the Dremel and attempt to re-slot them so we could attack with the Lisle's big flat head.

Only problem was that these screw heads were way down deep between the cooling fins.  It basically became the wrencher's version of Operation, requiring a very steady hand and steel nerves.  Stray by a millimeter on either side and suddenly you're grinding into cylinder head.

This was really my first time using the Dremel for anything besides making some test cuts, and I was pretty surprised by how steady it was and how much fine control you had.  Took my time and let the RPM's do the work, like they keep telling you over and over in the guides.  The tip was the #426 Fiberglass Reinforced Cutting Wheel and I did the whole thing at max speed.

Once in awhile I'd stop and check to see how well the Lisle flat head tip was fitting and whether it was getting good purchase.  Once it felt like it had a solid grip, it just took a couple very hard whacks with the impact driver and each screw came free.


A few shots of ever so delicately getting the Dremel between the fins.  (The Dremel's off in all these shots, of course.)  This is how I got to one screw.


Then the other screw...


Here are the screws after they took their beating.


CM91: Combustion Chamber

CM91: Lisle Impact Driver 4: Stuck Screws 2

Ok, so the Lisle impact driver isn't all powerful after all.  Ran up against three more stuck screws, this time on the rocker arm cover.  The screw at the 12 o'clock position eventually came free with just a few taps.  But the other two refused to give it up, and I ended up stripping them.

Out of six stuck screws total so far, the Lisle has taken down four.  I'll be keeping score.  Go Lisle!

So now it's the Dremel's turn to play.  Will attempt to re-slot them so I can fit the flat head attachment of the Lisle.

And if that doesn't work...?  Time to buy a drill...?


Thursday, June 23, 2011

CM91: Off With Your Head!

Cylinder head came off today.  As I'd disassembled all the way down to the camshaft several times already, the work went pretty quickly.

Everything was pretty straightforward, though Clymer's described there being a couple screws actually holding the head onto the cylinder, which I spent a couple minutes trying to find.  The picture in Clymer's was obviously a different model of engine, but I figured they'd just be somewhere else.  But after finding absolutely nothing, I decided to just pry the head off and viola - it popped right out.

My big mistake of the day was forgetting to charge the camera battery!  Had to switch to the iPhone camera about halfway through.


This little round spring thingy was hiding behind baseplate.  Clymer's didn't mention it so I wasn't watching for it.  Almost lost it...  It actually fits into the oil seal that's fixed into the center of the baseplate.


This gasket essentially disintegrated when I took it off.


A peek at the rocker arms.


A look at the camshaft.


The head as it begins to come off the dowels.


The top of the piston.


And finally, a few shots of the head itself.


Wednesday, June 22, 2011

CM91: First Peek at the Spark Plug

I believe this would be carbon fouling...


CM91: No Clearance for You!

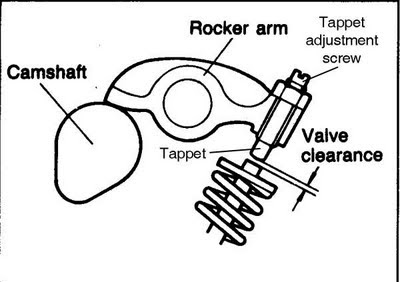
After a little help from the CT90 forums I finally figured out what I need to be measuring for valve clearances.  Note that Clymer's seems to be completely out in left field when they say that you should measure between the rocker arm and the camshaft lobe.

You're actually measuring between the bottom of the rocker arm and the top of the valve stem (if you were looking downwards at the intake).  But it was especially confusing for me at first because the clearance on the intake was way to tight.  Picture below shows my 0.05 feeler gauge not being able to make it all the way through.  And since 0.05 was the smallest I had, I didn't even realize there should be a gap there (as opposed to somewhere else).

Exhaust was actually a little better.  The 0.05 slid through with drag but 0.08 would not fit.


Tuesday, June 21, 2011

CM91: On the Road to the Camshaft

Thanks to the Lisle impact driver, we made big progress toward getting the camshaft out and the cylinder head removed.  Had to stop just short of actually removing the camshaft because the lunch break ended...  Such is life.

Breaker point assembly with securing screws finally removed.


Under the breaker point assembly is the ignition advance mechanism.


Near my finger is the back of the ignition advance showing the groove that mates with the dowel pin.


And finally, our first glimpse of the camshaft...

CM91: Sudden Impact

Today's VIP Tool Award goes to the new Lisle Impact Driver.  That stuck screw on the breaker point assembly plate that had me stymied last week went down in about five sharp taps.  But that wasn't the end of it.  On the path toward removing the camshaft there were two more stuck screws on the base plate that also bowed down under the awesome power of the Lisle!

Nothing better than when a tool does exactly what it's supposed to do.

And while the heads took some light damage and will certainly need to be replaced, the Lisle didn't even come close to stripping them.


The screw after the Lisle imposed its dominance.

Sunday, June 19, 2011

S90: Let's Focus on the Positives

Went through the bike from tail light to headlight, taking note of anything that seemed missing or rusted out, bent or broken off. 

Was thinking about the best way to blog it all...  Came to realize it would be a lot easier to just list what does work instead of what doesn't.

1. The engine isn't seized.
2. I think the gas cap is new.

Well, that's about it.  But I'd expect nothing less from a barn find.  The only silver lining here is that if I ever get this bike working I'll be able to safely say I know every inch of it.


Look at this shiny, shiny gas cap!


And the not-so-shiny parts...