Showing posts with label 1964 S90. Show all posts

Friday, August 29, 2014

Roxy: Mystery Solved (Thanks, Yahoo Group)

Ah-ha, so first you set the points gap by adjusting the points themselves, then you adjust the timing by rotating the BASE PLATE. 

Clymer could have done a much better job of clarifying that point.

I had to turn the plate pretty f ar clockwise to get it to the "F" mark.  But seemed to work ok.  She started up nicely on one kick at 60 degrees (though I did start her earlier today on 3 kicks).  I'll see how a 2-day cold start goes...


Wednesday, August 27, 2014

Roxy: Tune Up

Did most of a tune-up on Roxy.


  1. Wipe down, general inspection
  2. Chain slack = 3/8"
  3. Brake inspection = tightened up the rear brake
  4. Check air cleaner and fuel lines
  5. Spark plug
    1. Gap = ok
    2. Condition = black and carbon deposits
  6. Valve clearance
    1. Intake = ok
    2. Exhaust = tightened from .003" to .002"
  7. Points
    1. Condition = ok
    2. Gap = was 0.508 so I tightened to 0.4, but then to fix the Timing, I had to go back to 0.5
  8. Static Timing
    1. Was retarded (to the red mark), so I set it back to "F" mark, but that caused the points gap to open up to 0.5.  How do you reconcile that?  [edit 7/27/15: this means the points themselves are worn and should be replaced]

Skipped a few things:
  • Check batt voltage
  • Lube chain 


Wednesday, June 4, 2014

Roxy: Minor Service

Cleaned and lubed the chain.  Gave her a WD40 wipe down.


Tuesday, April 29, 2014

Roxy: Charging System Test

Tested Roxy's voltage at idle with lights off and on.  Multimeter was attached to batter positive and ground to engine block.

At idle I was seeing 7.75 (and climbing).

With lights on I saw 6.85 volts (high and low beams measured the same).


Monday, April 28, 2014

Roxy: DIY 5mm Screws Tested

Somewhat shocked to find the screw worked.  And I was able to thread it with my fingers the entire length.  It did cinch down tight at the end, though.  I'm wondering if that's too loose...?

Then I cut 3 more screws to see how the die would hold up.  By the 3rd one (4th overall) it was getting a bit hard to get the screw to bite in at first.  Also seemed like the screw was turning crookedly.

Yet the finished screw looked good, with clean threads at the right pitch.

It would be perfect if these socket screws weren't hardened alloy, but they don't seem to sell them any other way.  And I can't find regular pan heads in #12-28 either.

Still, if you could cut a half dozen screws before the die gave out, you'd still come out a little ahead of eBay.


Sunday, April 27, 2014

Roxy: DIY 5mm JIS Screws Continued

Ok, the second attempt to cut these 5mm JIS screws.  This time using #12-28 socket cap screws.  Amazingly, the #12-28 pitch is almost exactly 0.9 to begin with.  The problem is just that the screw is much bigger than 5mm, so you have to remove a lot of material.

Turning it through the die was definitely work, and you can feel the metal cutting.  Was worried how well the die itself would hold up cutting the alloy.


The screw before cutting.  It's already 0.9 to start.


About halfway through and you can see how much material has to be removed.


The finished screw.


Compared to the original.


Checking the pitch on the gauge.


Now I just have to TEST IT...

Monday, April 14, 2014

Roxy: Battery Check


Started off checking Roxy's voltage, which was 6.29V.  Also peeled the old electrical tape off for a first peek at the forward-facing ring clamps.  Fluid level still looked good.  Put fresh tape on the negative terminal.

At 58 degrees (but with some wind chill), I "primed" the engine (one kick with ignition off) and she started on one kick.


Monday, April 7, 2014

Roxy: DIY JIS Screws, First Attempt

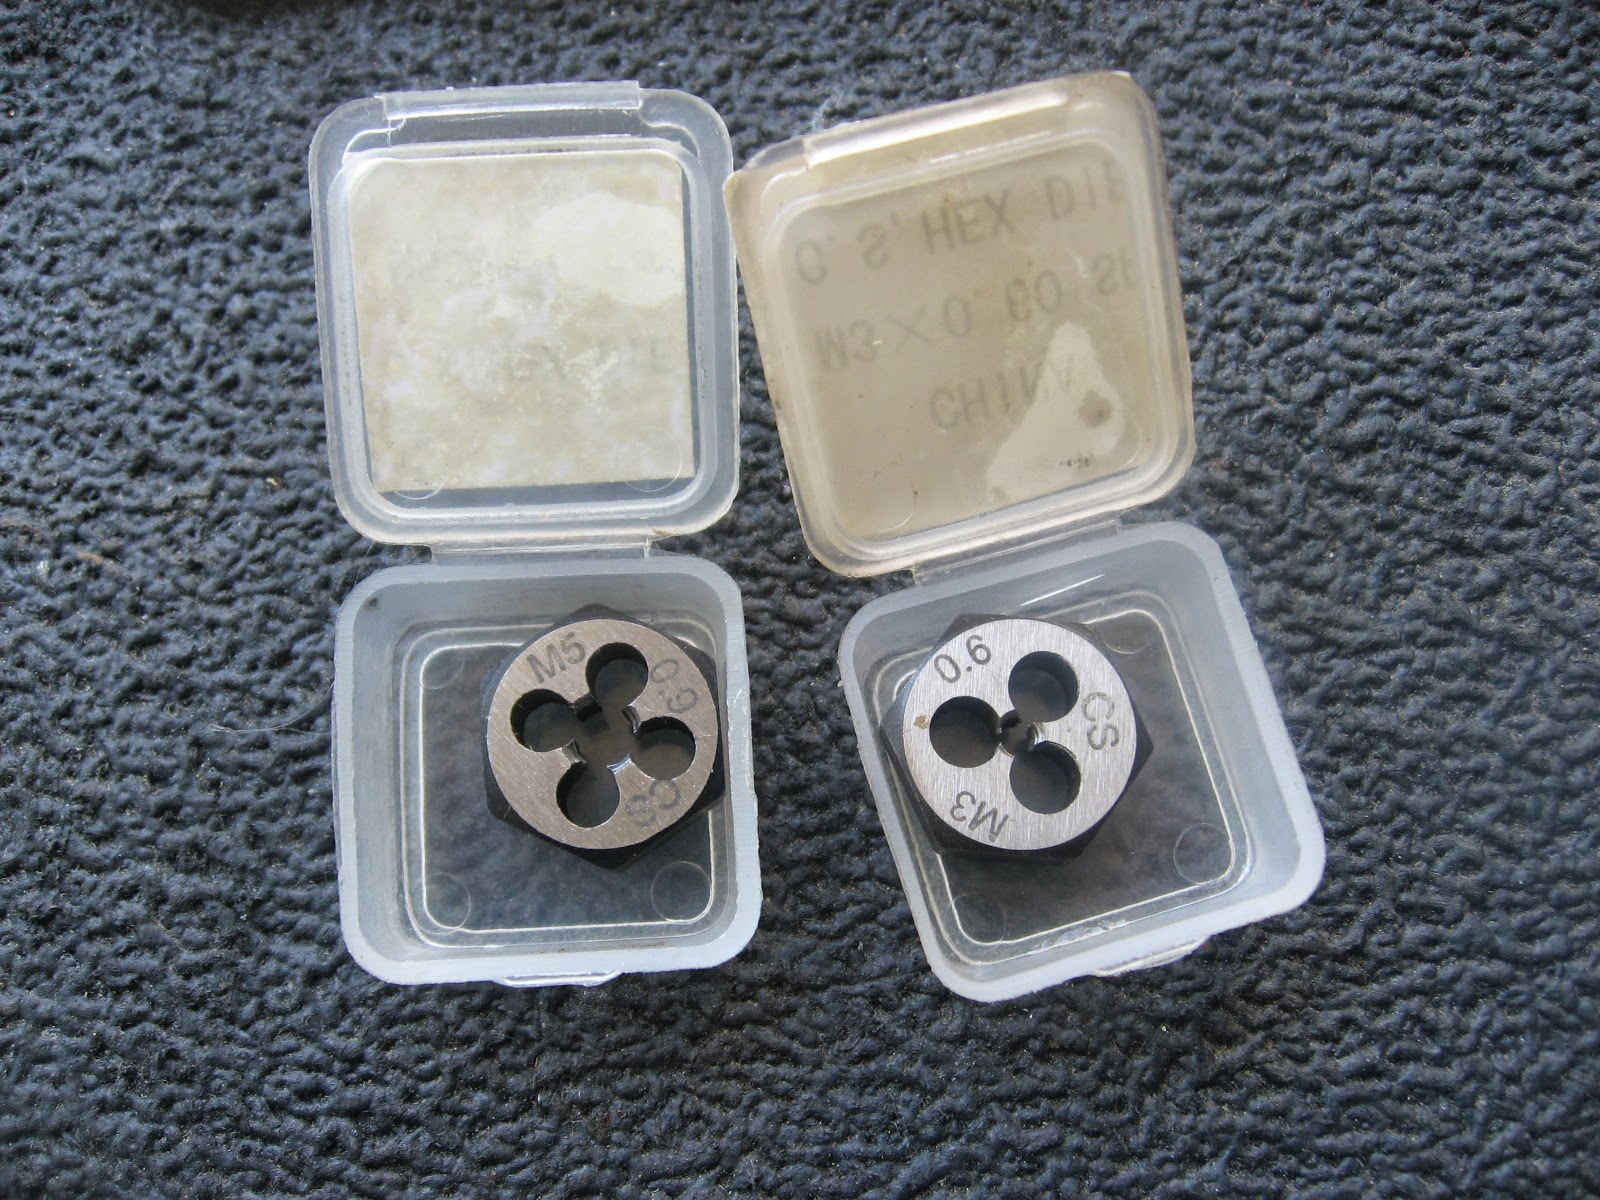
Received 2 new dies today: 5mm 0.9 pitch and 3mm 0.6 pitch.  Once again hoping to free myself from outrageous eBay prices.

First test was to try to cut a 5x10 screw for the points plate.  I held the die in place with the socket wrench, while turning it with the JIS vessel screwdriver.  Luckily, I was able to turn it by hand through the entire length.

I used a little WD40 as lube, and I would back off and resume any time it started to get hard to turn. Toward the end, I had to switch to holding it with a box wrench, as I think it bottomed out in the socket.  But even then, it just took a little elbow grease.

When I was done, the screw turned very easily in the die.  But checking it against the thread gauge, it was definitely not a clean 0.9 pitch.  It wasn't 0.8, either, so the die definitely recut it a bit - just not enough.

I could hand thread it three full turns in the actual hole (points plate), but I didn't dare force it any further than that.

Asked for advice on Yahoo Groups and a good suggestion came back: find a long screw that has solid metal between the head and the threads.  Cut the threads off, then use that to cut fresh new threads in the die.

So there's still some hope...


Also, the screws that hold the points to the plate are 4mm x 6-ish at 0.7 pitch (ie, NOT JIS).  And note they have both a split ring and a regular washer.


Monday, March 31, 2014

Roxy: Static Timing

It's going to rain all week, so I figured I'd set Roxy's static timing and if I messed anything up, at least I won't miss any nice weather.

It was very retarded and also I noticed the points plate itself was not exactly lined up to the mark.  Again, who knows whether all this is intentional (I really should have at least documented it when I first got the bike).

But she's been getting harder to start, even in warm weather.  So I'll see if this changes anything.'

I did start her right after making the change, and it took 6 kicks at 52 degrees, but I think I may have forgotten to switch the petcock on, so I'll drop the results of this test and try again tomorrow.


Thursday, March 27, 2014

Roxy: Jiffy Lube

Quick five minute lube job, no cleaning.


Wednesday, March 26, 2014

Roxy vs Viola: Muffler Madness

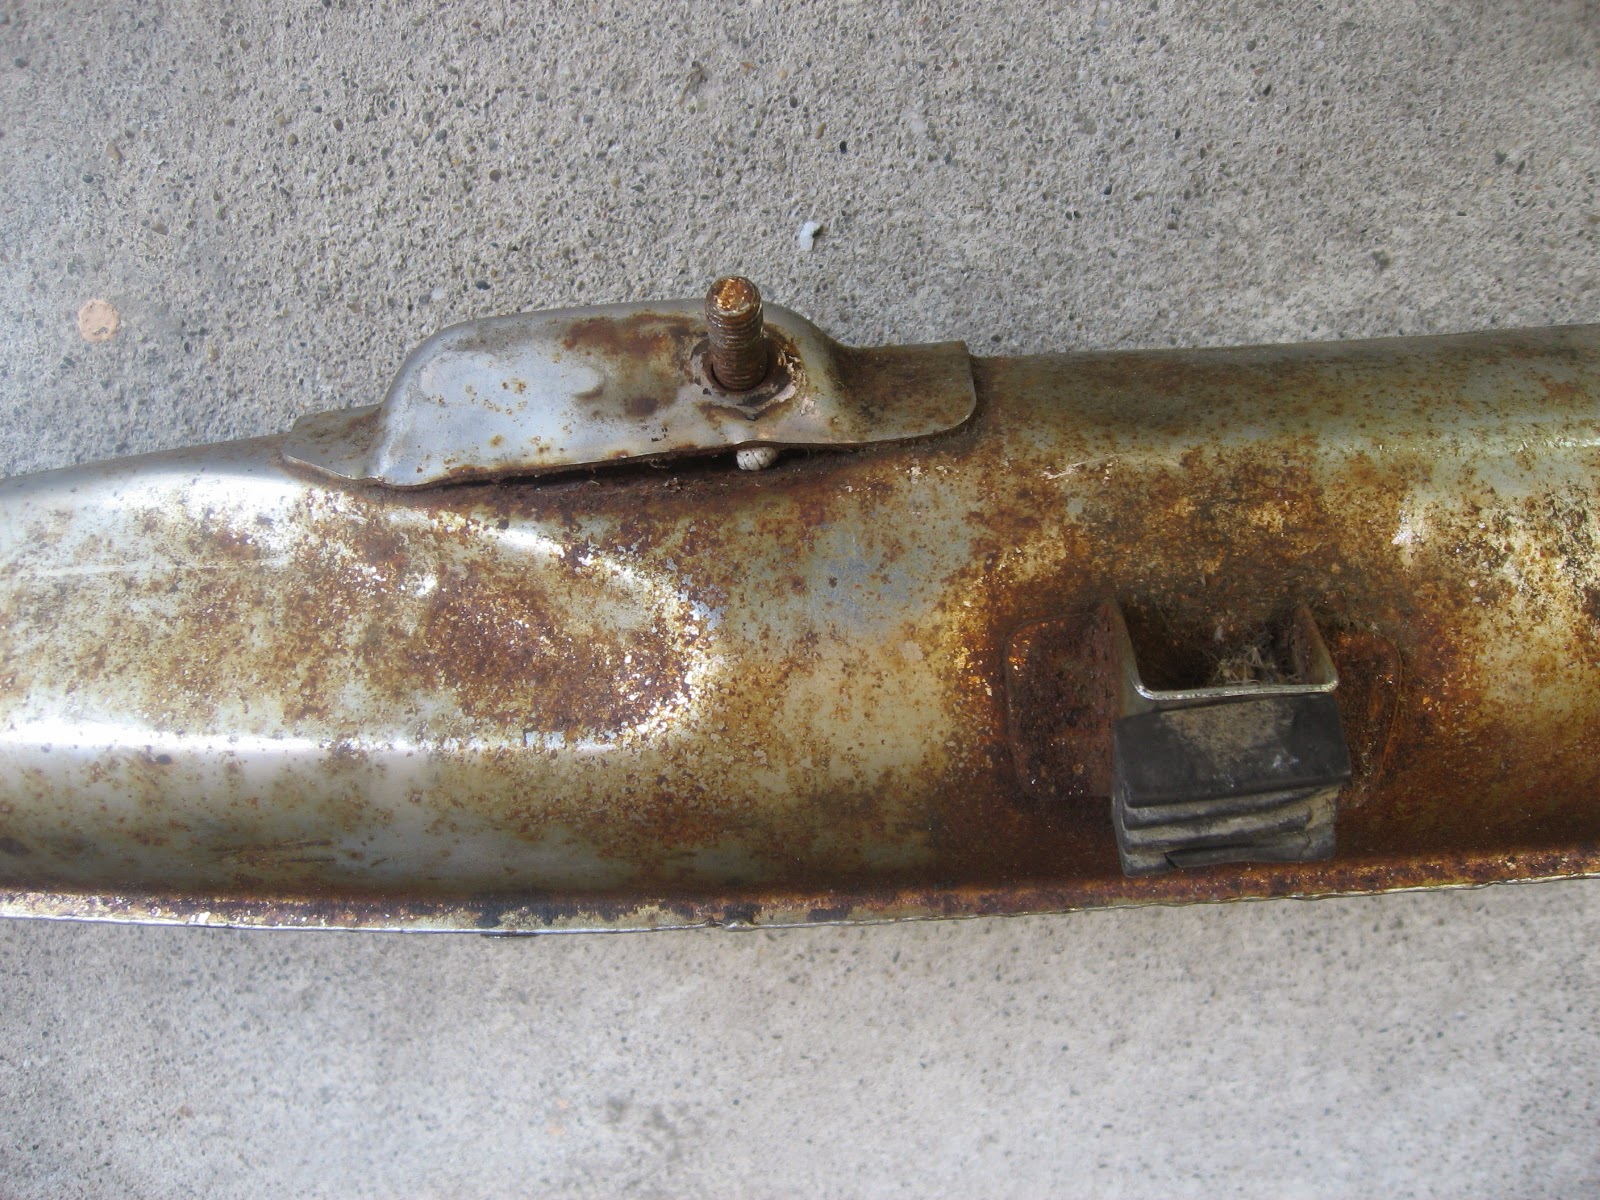
Looks like Roxy has the "late" (why late if she's supposed to be '64?) 2-piece muffler with 2 mounting points.  Viola has the single piece version that has a bolt that goes through the mount point and then secured with a nut.


Viola...


Roxy...


Tuesday, March 4, 2014

Roxy and Astrid: Advance and Rectify

Kicked things off using the makeshift plastic cover to stop the oil spray while I checked Roxy's advance.  It worked ok at first, but the warmer the engine got, the more oil started to drip out the bottom.  Really need to come up with one that screws in flush against the alternator cover, especially at the bottom where the oil finds its way out.

Also, since I was doing it solo, I had to rev the engine using the throttle cable, which was tricky.  It was easy enough to rev, but hard to hold it steady enough to then switch over to check the advance.

Also, I know see how convenient it would be to have a timing gun that shows RPM and Advance at the same time.  With the Actron, you have to toggle back and forth.

But in the end, I got a decent reading, I think.  At 4000 RPM, it looks like the advance was just hitting the first advance mark, or maybe a bit retarded from the first mark.  Either way, it appears the advance mechanism is working fine.

And she started on first kick, and idled fine.  I adjusted the idle slightly, and left it at about 1300-1400.


After that, I checked the idle RPM on Astrid.  She was a tad high and I lowered it down to the same 1300-1400 range.  She also started on first kick, and without hesitation.  Somewhat ironic that this recently resurrected engine runs at least as well as Roxy does.  Though I guess there's really no reason she shouldn't.

Since I still had some time, I figured I'd get rid of the old selenium rectifier while I was at it.  So I snipped off the wires (yellow and pink) right below the rectifier itself.  Wearing disposable gloves, I removed the rectifier and bagged in (adding the gloves as well).

The bike wouldn't start with the rectifier removed, which I figure is expected.  I bought the replacement rectifier at Radio Shack (#276-1185), and it looks pretty straight-forward to wire it up.  If she still doesn't start after that, then we'll have to troubleshoot.


Friday, February 28, 2014

Roxy: Not Elegant

Not a very elegant setup, but it'll do temporarily to stop the oil spray while I"m trying to do dynamic timing.


Thursday, February 27, 2014

Roxy: Timing, Timing, Timing

Took the new Actron CP7529 Digital Timing Light out for its first spin today.  Also had to shell out for an auxiliary 12v battery.  The positive and negative leads on the light go to the battery, the pickup goes to the spark plug wire, and then you connect the battery negative to an engine ground.  Worked like magic.

But... no one mentioned the oil spray.  Actually, once I had the alternator cover off, I did think to myself, "How will this spin without making a giant mess in the process?"  And sure enough, with the engine running and alternator spinning, a fine mist of oil sprayed out as expected.

Turns out you need to make either a cover with a small open window, or even a solid plexiglass one, so you can see the timing marks without getting sprayed.  Good to know...

But before I had the cover off, I did use the light just in RPM mode to finally set a good idle.  It was definitely idling way too fast, which I already knew.  Used the idle screw to bring it down to hover around 1350 or so.  At that speed, the timing mark looked to be between the F and T.  So slightly retarded.

New carb settings:  air screw at 1 turn even, idle screw only 1/4 turn out.

But then I did a static timing test.  I thought I'd done it before, back when I was having all the carb issues, but checking my notes, I don't think I ever did.

The shocker here was that when I checked with just the static light, the points were opening after TDC.  I've got a thread going on the S90 forum about whether this could be related to the engine work.  No definite answers yet.  Next step is I need to rig that oil shield and check advance timing.


Monday, February 24, 2014

Roxy: Original Airbox

Took some time to open up and WD40 the airbox that came as spare parts for Roxy.  It's in excellent condition.  The only thing I'd replace is the plastic side cover on one side (the other side is chrome).

Even the air filter element was in good condition.


Wednesday, January 22, 2014

Roxy: Kendall Bad

Learned from the S90 Yahoo group that I shouldn't be using automobile oil in the bike, especially the Kendall with "Liquid Titanium" additive.  The friction reducing agent unfortunately reduces friction in the clutch, which needs the friction to work properly.

Swapped it for Castrol motorcycle oil.  $7 per quart at O'Reilley's but probably worth the investment.


Monday, January 13, 2014

Roxy: Chain Slack

Chain slack was up to 1.0" so it was time to adjust.  Dialed the axle out just a few turns to bring it down to between 3/8" to 1/2".


Before...

And after...