Showing posts with label tools. Show all posts

Tuesday, October 6, 2020

Red: Slipping Clutch, Part III

Relatively routine at this point.  Swapped in the other extra-thick friction disk so that there were two fo them installed.

Didn't actually seem to impact the clutch distance that much but seemed better to have the two thickest in there so that hopefully that withstand the extra HP a bit better.

Got some new wood-handled screwdrivers which I then sanded down specifically to handle this oily clutch work.  Worked a treat!

Now just need to wait on the new clutch cable.


Wednesday, April 12, 2017

Run Ivy Run: Fanny Pack

Took a nice run down Lake to Ashley's Cafe.  Has the perfect parking spot and outdoor seating.  They serve dry cappuccino, but I guess you can't have everything.

Felt like the idle was weak during the whole ride and when I got back, I just let it die at the garage.  Wouldn't hold idle for more than a minute.

Came back down in garage gear.  Battery was fine at about 6.28V.  Spark plug looked ok, though noticed it was a D8HA.  Checked the gas flow through the carb and that seemed fine, too.  Noticed that when it was not idling well, turning the throttle screw seemed to have no effect... interesting.

Decided to swap out the plug for a new D6HA.  Started it up and she seemed a little better.  Then dialed the air screw out from 2 1/4 turns to 3 1/4 turns and that had her running strong.  But a bit weird that the screw would need to come out that much. 

Not quite satisfied with that result.  Probably need to invest in an aftermarket carb (with the gas line on the right!).

After that. rigged up the new Hide&Drink tool roll using the leather strap from Springfield leather.  Bolted it using the holes for the fender.  Came out rather well, to be honest.  Not sure if it's the best look (hanging it off the bottom of the left side seat is still best, I think), but at least I can carry it now.

Finally tested the first version of the 3D printed cable guide and it was way too big (as expected).


Wednesday, December 30, 2015

Motor: Tusk Tools

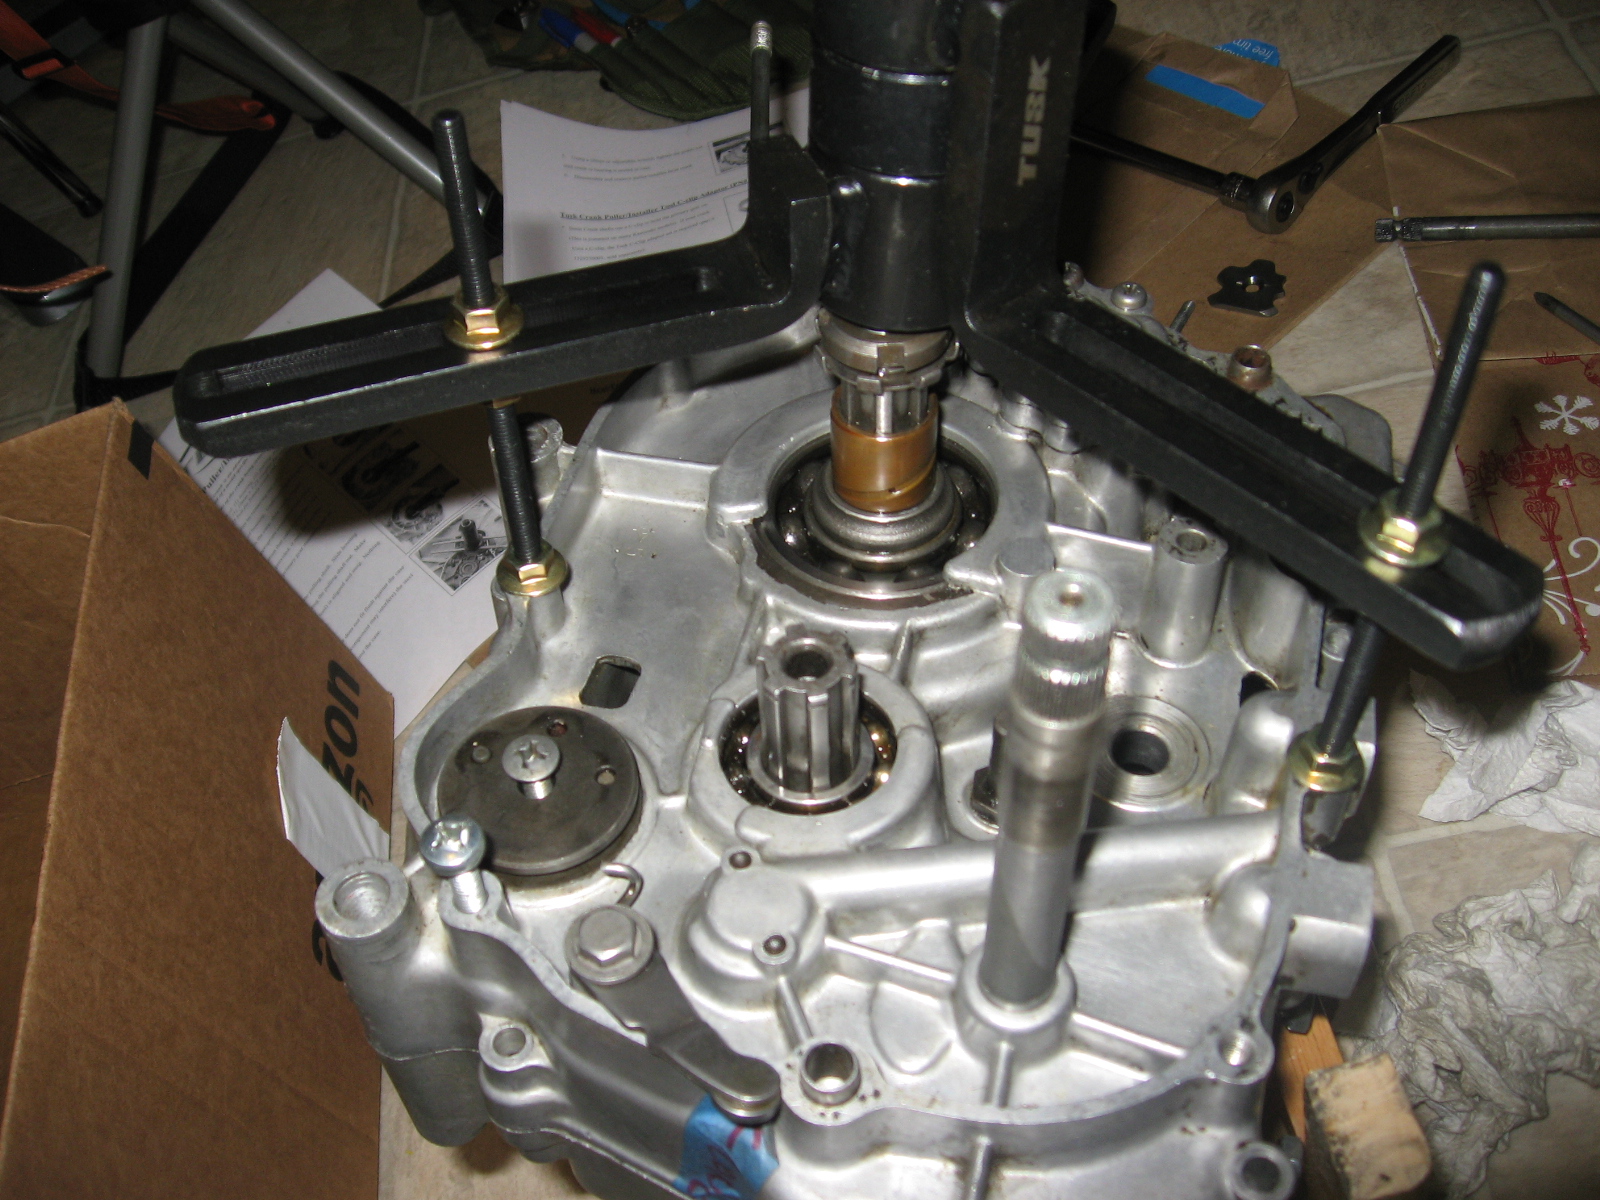
Got the new engine tools from Rocky Mountain today: the Tusk crankshaft installer/puller and the Tusk crankcase splitter.

I tried the installer first.  It comes with a variety of bolts/couplers and I was crushed to discover nothing would fit the S90's 16mm male thread on the clutch side.

But I realized that I could get it to work using my own 8mm bolt and washer on the alternator side.  It was surprisingly effortless to pull the crankshaft into place and the tool worked perfectly (and feels very hefty and solid).  It almost made me think I should just be installing the crank without tools but I think that would involve a lot of elbow grease and would probably result in me hammering the crank into place.  So in the end, maybe the tool just does its job too well.

The right crankcase cover just pushed down right over the bearing when I went to close the case.  I don't expect it would be like that for every motor.  But if I ever needed to use the tool on that side, I could either find a big 16mm bolt or shave down an old clutch nut enough so it fits inside the tool's main coupler.


Tried the crankcase splitter next and that worked exactly as expected.  Again, a very well-made and solid tool.


Sunday, August 30, 2015

Spares: Battery Cover, Gas Cup

Bought two $45 battery covers from a seller in Indonesia and this is the first one.  Very good shape other than the surface rust.  Put into a dip straight away.  At $45, can I make a decent profit on it if I clean it up and throw primer on it?  Or do I just collect battery covers and chain guards?  I'll need it for the next bike anyway, right?

Also got the new gas cup which looks to be worth the money spent.  Decided against testing it out since I now realize the S90 intake/carb will never fit the engine as long as it's in the CM91.


Wednesday, November 19, 2014

Garage: Chain Breaker

Got the new Motion Pro chain breaker and chain press tool.  Tested it on Viola's old 428 chain and it worked like a charm.  I did not grind down the rivet first but that didn't seem to matter.


Saturday, March 22, 2014

Spare Engine: Chaser

Finally got a chance to use the spark plug thread chaser I bought ages ago - and to good effect.  The threads in the head to be blasted were pretty wonky.  By slowly screwing in the chaser I was able to get them all lined up and now the plug will seat by hand.

I did it without packing the gaps with grease (because I was working in the kitchen), but I see how that would catch all the small metal filings.


Wednesday, March 12, 2014

Viola: Return of the Lisle

I shouldn't have even wasted time with those Grabit bits.  I went back to basics today, used the Dremel to reslot all 5 stuck screws on the new heads, and then the Lisle did the rest.  Beautiful teamwork!


Tuesday, March 4, 2014

Roxy and Astrid: Advance and Rectify

Kicked things off using the makeshift plastic cover to stop the oil spray while I checked Roxy's advance.  It worked ok at first, but the warmer the engine got, the more oil started to drip out the bottom.  Really need to come up with one that screws in flush against the alternator cover, especially at the bottom where the oil finds its way out.

Also, since I was doing it solo, I had to rev the engine using the throttle cable, which was tricky.  It was easy enough to rev, but hard to hold it steady enough to then switch over to check the advance.

Also, I know see how convenient it would be to have a timing gun that shows RPM and Advance at the same time.  With the Actron, you have to toggle back and forth.

But in the end, I got a decent reading, I think.  At 4000 RPM, it looks like the advance was just hitting the first advance mark, or maybe a bit retarded from the first mark.  Either way, it appears the advance mechanism is working fine.

And she started on first kick, and idled fine.  I adjusted the idle slightly, and left it at about 1300-1400.


After that, I checked the idle RPM on Astrid.  She was a tad high and I lowered it down to the same 1300-1400 range.  She also started on first kick, and without hesitation.  Somewhat ironic that this recently resurrected engine runs at least as well as Roxy does.  Though I guess there's really no reason she shouldn't.

Since I still had some time, I figured I'd get rid of the old selenium rectifier while I was at it.  So I snipped off the wires (yellow and pink) right below the rectifier itself.  Wearing disposable gloves, I removed the rectifier and bagged in (adding the gloves as well).

The bike wouldn't start with the rectifier removed, which I figure is expected.  I bought the replacement rectifier at Radio Shack (#276-1185), and it looks pretty straight-forward to wire it up.  If she still doesn't start after that, then we'll have to troubleshoot.


Thursday, February 27, 2014

Roxy: Timing, Timing, Timing

Took the new Actron CP7529 Digital Timing Light out for its first spin today.  Also had to shell out for an auxiliary 12v battery.  The positive and negative leads on the light go to the battery, the pickup goes to the spark plug wire, and then you connect the battery negative to an engine ground.  Worked like magic.

But... no one mentioned the oil spray.  Actually, once I had the alternator cover off, I did think to myself, "How will this spin without making a giant mess in the process?"  And sure enough, with the engine running and alternator spinning, a fine mist of oil sprayed out as expected.

Turns out you need to make either a cover with a small open window, or even a solid plexiglass one, so you can see the timing marks without getting sprayed.  Good to know...

But before I had the cover off, I did use the light just in RPM mode to finally set a good idle.  It was definitely idling way too fast, which I already knew.  Used the idle screw to bring it down to hover around 1350 or so.  At that speed, the timing mark looked to be between the F and T.  So slightly retarded.

New carb settings:  air screw at 1 turn even, idle screw only 1/4 turn out.

But then I did a static timing test.  I thought I'd done it before, back when I was having all the carb issues, but checking my notes, I don't think I ever did.

The shocker here was that when I checked with just the static light, the points were opening after TDC.  I've got a thread going on the S90 forum about whether this could be related to the engine work.  No definite answers yet.  Next step is I need to rig that oil shield and check advance timing.


Monday, January 20, 2014

Viola: The Right Tool for the Job

After a tip from a fellow Instagrammer, I picked up a Lisle Parts Brush, and was finally made some headway in cleaning the spare S90 engine.  First, I just used some dishwashing soap to get the major grime off.  Some of it was caked on so thick that I had to scrape it with a screwdriver, but the brush actually cleaned where no brush was able to before.

After the soap, I was still left with a greasy residue.  So I switched to WD40 and the parts brush, which again worked wonders.

Before, during, and after...


From another section...