Showing posts with label electrical. Show all posts

Saturday, November 7, 2020

Evie: Semi Permanent Setup

Wanted to add a kill switch to Evie for easy startup.  Got the spare handlebar switch, which had tested fine, hooked up only to find I'd screwed it on off kilter and had actually ended up melting the contacts.

So ended up just hooking it up to the big box switch.

Ran and fired up nicely.  So now she's at least got a nice semi-permanent fuel and switch setup for garage starts.


Sunday, August 30, 2020

Roxy II: Carb Swap

 So after the first shakedown run where she couldn't hold idle once warmed up, decided to swap over to the Keihin CS90C (#1).  

Had the total golden touch today.  The carb swap went smoothly (nice to have the looped extra length of fuel line) and she started right up and ran with no issues.

Then ran the kill switch between the points wire and the coil and that worked a treat.  Ran the black/red wires along ridge behind the air filter and zip tied it into the holes for the stock air box.  Used the cloth electrical tape to tidy it up.

New brake cable went in.  The nodule was a bit too tall to fit the lever, but shaved it down just a bit and then it went in no problem.

Finally, padded the inside rim of the headlight with more cloth tape to get rid of the rattle.

Four jobs that could have gone either way but all ended up smooth as butter and everything worked!  Love days like this...


Saturday, August 22, 2020

Roxy II: Switches and Lights

Hooked up the horn switch.

Hooked up the low beam so that it is powered on by the key switch but can also be toggled from the handlebar switch.

Tried to run the kill switch wires straight up from the battery box along the clutch cable.  The wiring was fine, but realized that it doesn't actually stop the engine because the alternator is providing power at that point.  Need to interrupt the alternator wire.  Would be nice to even make that a switch so that it I could have the option to run it at any point if needed.

Cleaned and lubed the chain.  Slack ok.

Front tire down to 25.  Rear is ok.

Waiting for handlebar wrap and then I think we take her out for a shakedown.


Friday, August 7, 2020

Roxy: New Headlight Installed

Was worried that it would be tough to get Roxy's bridge off, but realized that when I'd had that issue in the past it was probably due to the axle nut being tight and the forks causing too much tension in the bridge.

With the axle nut loosened, the bridge popped right out, no problem.

Got the old wiring out and fitted the new light just as I'd tested it on Evie.

Cleaned up the old wiring, added labels, swapped out to Waco connectors as needed.

Tested and everything working as expected!


Tuesday, August 4, 2020

Roxy: Headlight Wiring

Got new shorter black mounts, but the width of the mounting points is too wide for the forks.

But found that by using smaller 8mm bolts (instead of 10mm) it gives the mounts enough room to bend diagonally inwards so that the light can mount.

Also has the benefit of creating a tension (as both mounts push outward) that can actually hold the light in place even without the outer bracket.

So the outer bracket becomes just an extra measure of securing instead of the only thing holding it up.


Monday, April 20, 2020

Ivy: Timing and Loose Wires

So Ivy losing spark was either the timing being off, or the points wire getting disconnected, or maybe both.  Although the disconnected wire makes more sense as I may have kicked it loose when I stopped to check for smoke the previous day.

Still, good to set the timing correctly anyway.

With that done and the points wire firmly connected, she started up easily and we ran a few laps around the hood with no issues.  Though did need to tighten up the clutch cable a bit.


Saturday, January 25, 2020

Red: 7.5 Volts

Realized that if I was short on voltage with the engine running and the lights on, then why not add a couple extra?  Seemed like the low horn volume when running was simply due to the low volts.

So rigged up an extra D battery to clip into the existing harness.  Tested ok, so then soldered everything together.

Test run showed a much better horn volume, though still not super loud...


Wednesday, August 28, 2019

Summer Garage Day Three

Installed the new headlight switch (just $13 from Amazon and looks trick!).  Surprisingly took 3 hours to do it all and then clean up all the wiring.


Saturday, August 3, 2019

Red: Wago Connectors

Installed the new Wago "Lever-Nuts".  Great piece of kit...


Saturday, July 27, 2019

Red: Wiring Cleanup

Big wiring cleanup day.

Using a hot-off-the-press color coded wiring chart, started by putting fresh labels on everything (and fixing a few that were mislabeled).

Popped open the headlight to find tons of usable space.  Moved all the front end wiring into the headlight, except for the speedo wiring because it was a thick bundle and just naturally flowed back to the box.  But now all the other power and ground wires are housed inside the headlight.  Looks much cleaner.

Then also ran a new wire from tailight into the battery box as a ground wire.  But this one is now solidly ground into the fender bolt.  This means I can dump the alligator clip ground that was never confidence inspiring in the first place.

Feeling very solid with the entire loom now.  One last improvement will be adding some kind of terminal block instead of the jury-rigged bullet connectors.


Friday, July 26, 2019

Red: Low Volts

Came down and flipped on the switch and voltmeter was suddenly reading about 5.25 volts even though I knew the battery should still have 6+.  Tested the battery on the multimeter and sure enough, it was 6.25V.

Tested the voltmeter itself direct to the battery and it was reading correctly, too.

After a lot of testing and extremely unhelpful posts on both Yahoo and Reddit, I realized that the voltage was fine until I connected the coil, then it would drop low.  Disconnect the coil and it would go back up.

Also, letting the bike idle and then trying again sometimes put it back to full volts.

Another clue, start the engine and the volts would go back up to 6+ volts.

I feel like it's somehow related to checking the volts with the points open or closed...?


Sunday, July 21, 2019

Red: Fork Seal, Part II

Surprised when I realized I'd done a four-hour session.  Wasn't anything so epic, but perhaps I was taking my time.

Went through the now-familiar process of removing the seal unit from the right fork, but realized something was a bit off when I opened up the drain plug and nothing came out.

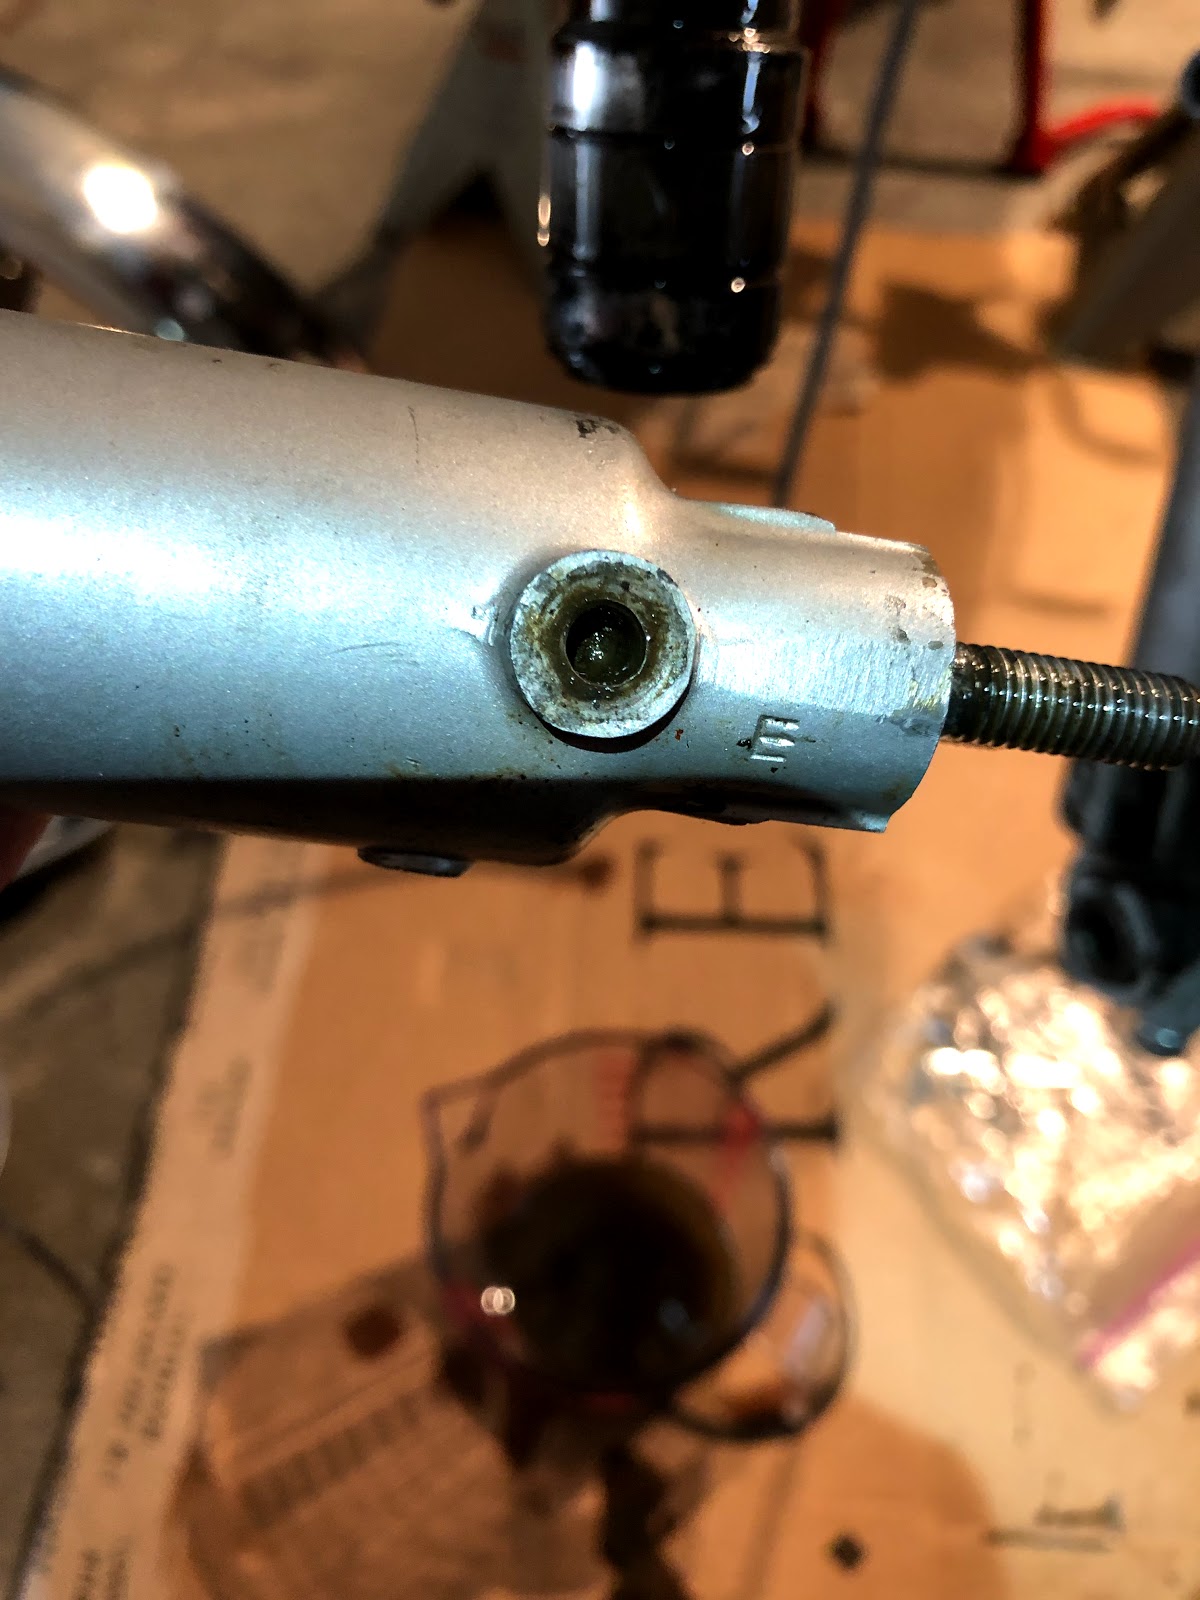
Pulled the bottom fork off and saw the opening was pretty gummed up.  Shined a light into the hole and it was completely blocked up.  Used a small allen wrench to poke around and finally saw there seemed to be not only fork muck but also some kind of residue, maybe very old gasket material.  Then used a longer bolt to clean the threads and push it out.  Sprayed the inside out with the hose to rinse it clean, then ran some WD40 through it.

Bolted everything back up and flushed it with a tiny bit more fork oil before filling it with 125mL of clean fluid.

Given how much muck was in the right, was worried same might be true on the left.  Removed the bolt and once again, nothing flowing.  Popped the bottom off and pretty much the same level of muck although no gasket residue on this one.  Just did the power rinse with the hose and the WD40, which seemed to clean it all out nicely.  Filled with 125mL.


Took a fresh look at the battery compartment.  Had hoped to use the new terminal block to attach all the positive leads together, but even though the block fit fine in the compartment by itself, once it actually had wires attached to it, it was just too clunky to fit clean.

But after untangling and sorting the wires a bit better, realized that maybe I could get away with just organizing the existing mess a bit better.  Removed the old "junction" and chopped each lead much shorter to get rid of the excess.  Also used a zip tie to lock all the positives together.

The negative bundle was the only one that attached to the battery so only those wires had to be long.  Shortened one of the kill wires and then used a bunch of zip ties to make it a little neater.

Putting everything back in, it's still a nest of wires, but when you pull them free, it's much more organized and clear where everything is supposed to go.  So good enough for now...

Still not sure why Ivy's compartment is so "empty" compared to Red's...

Also checked the plug and it was black and clean.