Finally took the last step of hooking up the tank to the carb. And ran her for a few minutes after that...
Everything hooked up nicely, though it's a somewhat untidy arrangement. Wonder how you could clean it up if this were a real show bike.
Showing posts with label CM91. Show all posts
Friday, August 15, 2014
Wednesday, August 6, 2014
Astrid: New Fuel
Attached the new filter/cutoff to the tank, both main and reserve. Tested the reserve line by running plain water through it first (seemed to clean out some old evapo-rust). Then ran gas through it a few more times. The gas seemed to clog up the second time around, but then started to flow.
Don't plan on using the reserve line much, but just trying to clean the gunk out of the bottom before filling the tank permanently.
Labels:
CM91,
fuel system
Wednesday, July 2, 2014
Astrid: Scrambled Eggs
The old Evapo-rust in Astrid's tank was looking decidedly murky, so figured I'd dump and refill it. Surprised to find something looking like scrambled eggs had coagulated at the bottom. Not sure what it is, perhaps the Yahoo crew can identify. I dumped out all the old liquid (tank looked like it was vomiting), then decided to risk rinsing the inside of the tank out with the hose to loosen as much of the "egg" as possible. Got about 90% out in the end.
Also tested the reserve line to see if it was clear, and it was.
Finally, refilled the tank with what I had left of the Evapo-rust. Also filtered out what I had used on Red's fork bridge and added that in, too. Ended up with more than before, so I expect I'll knock out more rust with this batch.
Also tested the reserve line to see if it was clear, and it was.
Finally, refilled the tank with what I had left of the Evapo-rust. Also filtered out what I had used on Red's fork bridge and added that in, too. Ended up with more than before, so I expect I'll knock out more rust with this batch.
Labels:
CM91,
fuel system,
restoration,
rust
Wednesday, May 21, 2014
Astrid: Soft Start
It's amazing how easy the Cub is to start. Looks like I last started her on 4/22, almost a month ago. And today she started on one soft kick at 60 degrees. I barely even have to put pressure on the kickstarter, and she comes to life before the lever is all the way down.
Today I ran her for a full 5 minutes, revving occasionally. Saw a couple leaks: one from the exhaust valve cover, and one from the oil drain.
Labels:
CM91
Friday, May 9, 2014
Astrid: Painting Planning
Trying to examine all the parts on the Cub that would need to get painted. What could I remove and paint off the bike - versus what I would have to paint on the bike. Is it even do-able?
Labels:
CM91,
painting,
restoration
Wednesday, March 26, 2014
Astrid: Start and Start Again
Pulled the camshaft to do the pencil test and confirmed it's an S90 grind. While I was at it, I also re-gapped the plug (narrowed it a bit), set the exhaust valve clearance (opened it up a bit), and set the static timing back to the mark (it was a little advanced).
Bike started with three kicks off of 6.33V, but also unfortunately found some oil leaks.
Monday, March 17, 2014
Fabrication: Date with the Dremel
Tested the new cover for fit. Not too far off, though certainly wasn't perfect.
The window alignment was spot on, but I'll need to widen it even beyond the red marks.
Again, just a bit off.
The top screw hole didn't line up perfectly once the other two were screwed in.
A trip to the vice and a date with the Dremel.
Finally a good fit for all 3 holes.
Cleaned up the viewing window but plan to cut an even bigger one using a cutting wheel.
Labels:
alternator,
CM91,
fabrication,
timing
Thursday, March 13, 2014
Astrid: Battery Tender Jr.
After a few kickstarts and idling for a minute, the new UB645 battery dropped from 6.4V to 6.29V. I hooked it up to the Battery Tender Jr. for the first time today. Unfortunately, the UB645 has some male spade connectors (bent at 90 degrees) and neither the included ring connectors or alligator clips made for good attachments.
I tried electrical tape to keep them in place, but I think they kept separating, since I'd sometimes see the light on the Battery Tender go out. Then I'd fix the contacts and then the light came back.
It charged in "storage" mode (green light) for about 30-40 minutes, and the voltage went from 6.29 to 6.38.
I'll try to make a more solid connector and then see what happens with a longer charge.
Labels:
battery,
CM91,
electrical,
Run Astrid Run
Wednesday, March 12, 2014
Tuesday, March 11, 2014
Viola: New Battery
Got a new sealed lead-acid battery given what a short life the 6V's have when used to start the bike. As expected, the new battery's 6.4V dropped to 6.27 after some kickstarting and idling. Also got the Battery Tender Jr. and we'll see how well that works to bring the battery back up to full charge.
Labels:
battery,
CM91,
electrical,
Run Astrid Run
Friday, March 7, 2014
Astrid: More Electrical 101
So I'm starting to understand the role of voltage in the overall system. I'm pretty sure that when I was having issues starting recently, it was simply due to the fact that the battery wasn't putting out enough voltage to start the bike anymore. I also clearly saw that just cranking it over and over again (causing spark but no start) is a sure way to drain any battery.
I feel like something about the rectifier wiring also affected the battery drain, but I have yet to prove that or understand it completely.
But I am sure that 5.9V is not enough to start the bike. And on the flip side, 6.4V is indeed enough. Not sure what the bare minimum is yet.
Also replaced Astrid's very perished rubber air hose with a 1 1/2" ID tube which I think is meant for a lawn water hose or something like that.
Labels:
airbox,
battery,
CM91,
electrical
Wednesday, March 5, 2014
Astrid: No Time For Pictures!
With so much going on, I completely forgot to take any pictures of this garage session.
- First, I hooked up the new Radio Shack rectifier. Was bummed to find out that the mounting hole is significantly smaller than 6mm. The Yahoo group says it's ok to drill it out to widen it, but seems odd that you could do that without disturbing any of the internals. But at $3 a pop, I guess it's a cheap test.
- After hooking up the rectifier, the engine still would not turn over. So I decided to run through all the basics.
- First checked for a spark. Was surprised to see that it was sparking fine. Up to that point, I was sure the problem was electrical and that there wouldn't be a spark.
- Did a compression test (still 120) and checked static timing (still good).
- Then checked valve clearances and found that there was basically no gap on the intake valve. So I set clearance to .002 and wouldn't you know it, the bike started right up.
- But then I found she would not idle at all. But battery voltage was down to about 5.6V, and I'm wondering if it basically can't keep a spark unless the engine is being revved.
- Next steps
- Reset the idle screw because like an idiot, I messed with the setting without checking where it was originally set at.
- Since I have to take the air hose off to set the idle screw, I'll see if the new piping I bought can replace the old stiff rubber hose.
- Check valve clearances again, and this time tighten the retaining nut a little more.
- Hook up the new 6V battery.
- Kick away
Labels:
CM91,
electrical,
valves
Tuesday, March 4, 2014
Roxy and Astrid: Advance and Rectify
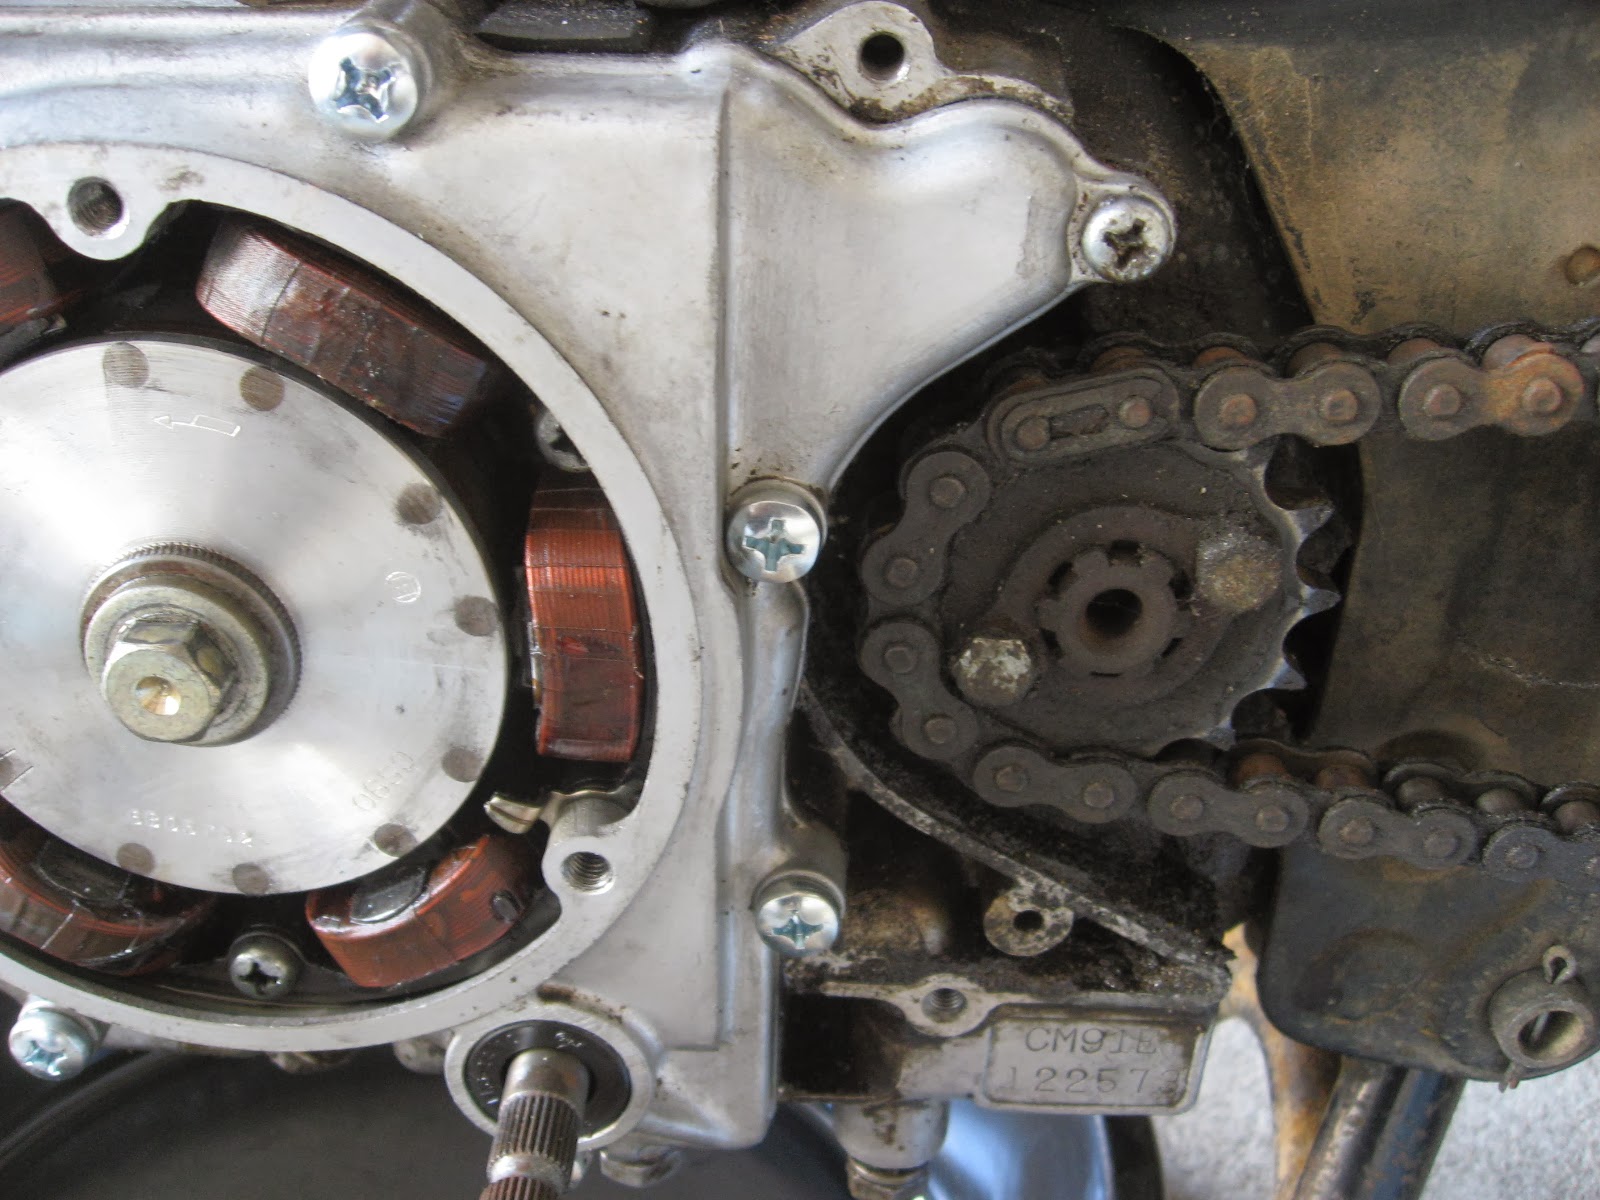
Kicked things off using the makeshift plastic cover to stop the oil spray while I checked Roxy's advance. It worked ok at first, but the warmer the engine got, the more oil started to drip out the bottom. Really need to come up with one that screws in flush against the alternator cover, especially at the bottom where the oil finds its way out.
Also, since I was doing it solo, I had to rev the engine using the throttle cable, which was tricky. It was easy enough to rev, but hard to hold it steady enough to then switch over to check the advance.
Also, I know see how convenient it would be to have a timing gun that shows RPM and Advance at the same time. With the Actron, you have to toggle back and forth.
But in the end, I got a decent reading, I think. At 4000 RPM, it looks like the advance was just hitting the first advance mark, or maybe a bit retarded from the first mark. Either way, it appears the advance mechanism is working fine.
And she started on first kick, and idled fine. I adjusted the idle slightly, and left it at about 1300-1400.
After that, I checked the idle RPM on Astrid. She was a tad high and I lowered it down to the same 1300-1400 range. She also started on first kick, and without hesitation. Somewhat ironic that this recently resurrected engine runs at least as well as Roxy does. Though I guess there's really no reason she shouldn't.
Since I still had some time, I figured I'd get rid of the old selenium rectifier while I was at it. So I snipped off the wires (yellow and pink) right below the rectifier itself. Wearing disposable gloves, I removed the rectifier and bagged in (adding the gloves as well).
The bike wouldn't start with the rectifier removed, which I figure is expected. I bought the replacement rectifier at Radio Shack (#276-1185), and it looks pretty straight-forward to wire it up. If she still doesn't start after that, then we'll have to troubleshoot.
Friday, February 28, 2014
Astrid: Semi-Permanent
Setup wiring with the battery lying in the compartment. Still not anything permanent, but this lets me shorten all the wires and reduces the chances of knocking something loose while kicking.
Labels:
battery,
CM91,
electrical,
Run Astrid Run
Wednesday, February 26, 2014
Astrid: Tank Cleaning
Removed the tank, which turned out to be as easy as removing four bolts. Pulled the fuel lines out so I could shake the big rust chips out of the tank. Then I re-attached the tank, but let the fuel lines poke out of the battery compartment. It should be pretty easy to run new lines when I'm ready.
Plugged the fuel lines with golf tees and filled the tank about half full of Evapo-Rust.
Labels:
CM91,
fuel system,
restoration,
Run Astrid Run
Monday, February 24, 2014
Astrid: Gas Tank Testing
At the risk of adding even more corrosion to the inside of the tank, I ran water through Astrid's reserve line to see if a lot of gunk would come out. There was some sediment, but nothing a good filter couldn't handle. The bigger chunks stayed inside the tank as expected.
I'm considering filling the tank with Evapo-Rust and letting it sit for a couple days before then flushing it out again and finally replacing with gas.
Though with all the sparking going on, I'm still a bit nervous having gas in the metal tank. Maybe I should leave the Evapo-Rust in until a more permanent (non-sparking) battery solution is in place. Wouldn't hurt to let the Evapo-Rust sit for as long as possible anyway.
The old fuel filter cracked and the rubber fuel lines themselves are brittle and perished. I'll need to see about replacing the fuel lines completely.
Labels:
CM91,
fuel system,
Run Astrid Run
Sunday, February 23, 2014
Astrid: On a Roll...
So the oil leak turned out to be just a few alternator cover screws that weren't tightened down. They were the 3 that were hidden by the sprocket cover. Replaced them and tightened them and wouldn't you know it - no more leak.
Tested the homemade static timing light for the first time. Worked like a charm.
I must have confused the S90 and CM91 kickstarters at some time in the past, since this one that was on Viola has way more clearance.
Original battery is a 6N5.5 - 1D by Cycle Tron.
Tested the homemade static timing light for the first time. Worked like a charm.
I must have confused the S90 and CM91 kickstarters at some time in the past, since this one that was on Viola has way more clearance.
Original battery is a 6N5.5 - 1D by Cycle Tron.
Labels:
battery,
CM91,
electrical,
restoration,
Run Astrid Run,
timing,
top end
Subscribe to:
Posts (Atom)


