Showing posts with label epic. Show all posts

Saturday, March 7, 2020

Ivy: Victory!

No real tricks here except elbow grease and repeated attempts.  I suppose the only trick is that you have to keep pressure on the extractor so that it doesn't back itself off of the stud as you tighten it down.


Saturday, February 1, 2020

Red: Epic, Forks and Leaks

Had put off these bigger jobs for a long time...

Started by draining the oil to take another look at the left cover oil leak.

Saw that there was definitely old gasket on the cover, so scraped some off and then also used 2000 grit and with cover flat on plexiglass tried to smooth it down evenly.

Went back to the regular paper gasket to get a "default" setting.  The cork-rubber gasket seemed to be holding up fine, though.

After that, swapped out the clutch.  Screen filter was VERY dirty.  Pretty much blocked solid.  Some sludge in the clutch basket trap (clutch got swapped anyway).

All that took three hours.

Then on to the forks.  Pulled just the right one and removed both of the ACE o-rings.  With wheel back on, the fork was spurting oil on every compression.

Put the ACE o-rings back but put some grease around them to try to prevent the forks from sticking.

EDIT (next day test ride results):  Unfortunately, still getting a small leak from under the left cover, but now a BIG leak coming out the top.  Did sanding the bottom introduce a warp at the top?!

Right fork still leaking but they don't stick anymore!

Clutch much better now.  No more "heavy" third kick.  Seems to start much easier, too.  Also ended up dialing the throttle screw way down.


Friday, December 27, 2019

Red: Epic Top End Swap

Four hour epic battle, though the tasks were relatively simple.

Needed to test the theory that maybe it was the cylinder head (valves) that were at fault.  So swapped over Ivy's head to Red.  Also swapped back to the red cylinder jug to "reset" everything.

Fired her up and now she was absolutely blasting smoke.  Filled the garage in seconds.

Then left with no choice but to do the full swap from Ivy: head, jug, and piston.

No big issues doing the swap.  Fired her up and finally, only a trace amount of smoke (probably from the oil inside the muffler).

A few things to note:
- Ivy's head had the solid head gasket as opposed to the cut out.  Left the solid one as it had seemed to work fine up to this point.
- Finally realized that there are 2 sizes of base plate, which line up to 2 different sized cylinder heads.  The smaller 62mm base plate can fit in either.  But the bigger 69mm can only ever fit in a 69mm head.  Go figure...

Ran around the block and confirmed smoke issue "fixed".  But seems to confirm that it was always a case of bad cylinder walls.  The Ivy cylinder was very, very clean.


Sunday, July 21, 2019

Red: Fork Seal, Part II

Surprised when I realized I'd done a four-hour session.  Wasn't anything so epic, but perhaps I was taking my time.

Went through the now-familiar process of removing the seal unit from the right fork, but realized something was a bit off when I opened up the drain plug and nothing came out.

Pulled the bottom fork off and saw the opening was pretty gummed up.  Shined a light into the hole and it was completely blocked up.  Used a small allen wrench to poke around and finally saw there seemed to be not only fork muck but also some kind of residue, maybe very old gasket material.  Then used a longer bolt to clean the threads and push it out.  Sprayed the inside out with the hose to rinse it clean, then ran some WD40 through it.

Bolted everything back up and flushed it with a tiny bit more fork oil before filling it with 125mL of clean fluid.

Given how much muck was in the right, was worried same might be true on the left.  Removed the bolt and once again, nothing flowing.  Popped the bottom off and pretty much the same level of muck although no gasket residue on this one.  Just did the power rinse with the hose and the WD40, which seemed to clean it all out nicely.  Filled with 125mL.


Took a fresh look at the battery compartment.  Had hoped to use the new terminal block to attach all the positive leads together, but even though the block fit fine in the compartment by itself, once it actually had wires attached to it, it was just too clunky to fit clean.

But after untangling and sorting the wires a bit better, realized that maybe I could get away with just organizing the existing mess a bit better.  Removed the old "junction" and chopped each lead much shorter to get rid of the excess.  Also used a zip tie to lock all the positives together.

The negative bundle was the only one that attached to the battery so only those wires had to be long.  Shortened one of the kill wires and then used a bunch of zip ties to make it a little neater.

Putting everything back in, it's still a nest of wires, but when you pull them free, it's much more organized and clear where everything is supposed to go.  So good enough for now...

Still not sure why Ivy's compartment is so "empty" compared to Red's...

Also checked the plug and it was black and clean.


Sunday, May 12, 2019

Red: Epic Tank Fail


Today was more about recognizing when you're about to step over that line from bad to worse.

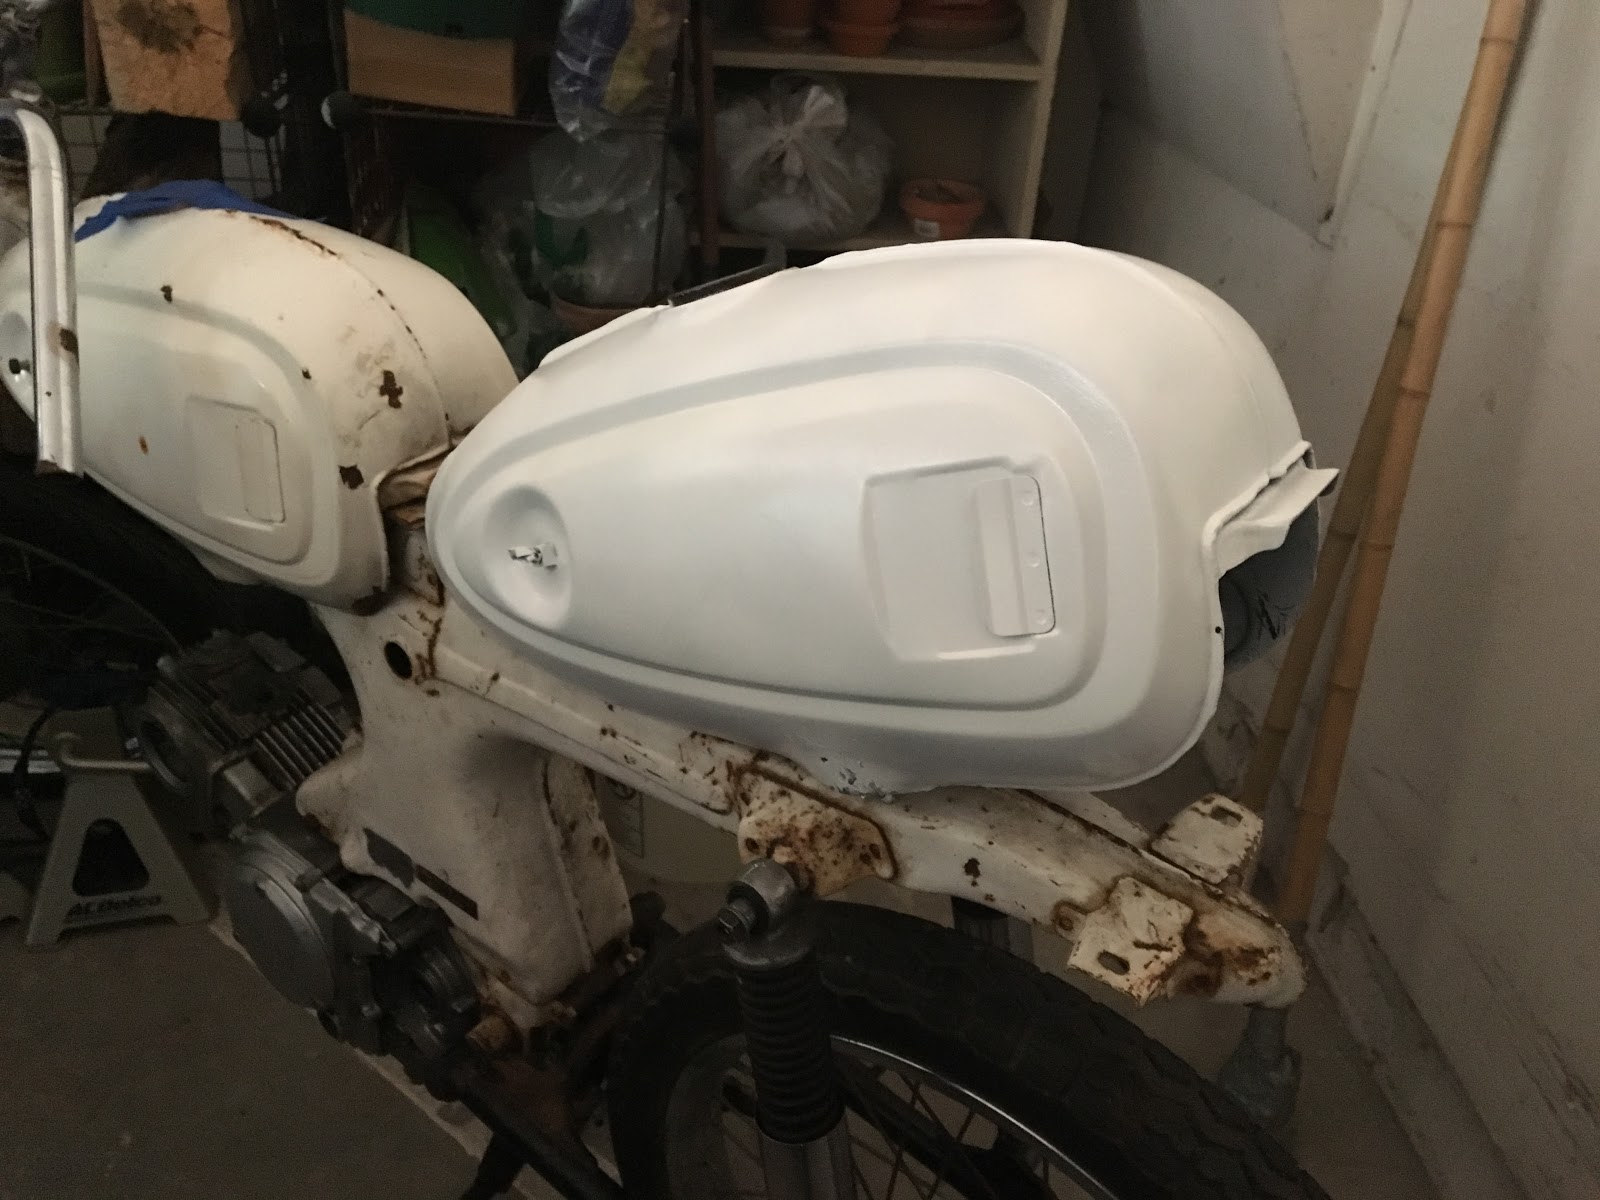
Session started out okay.  The tank had dried nicely but I could still see some black coming through the white coats so I added a few more layers before doing the top coat.

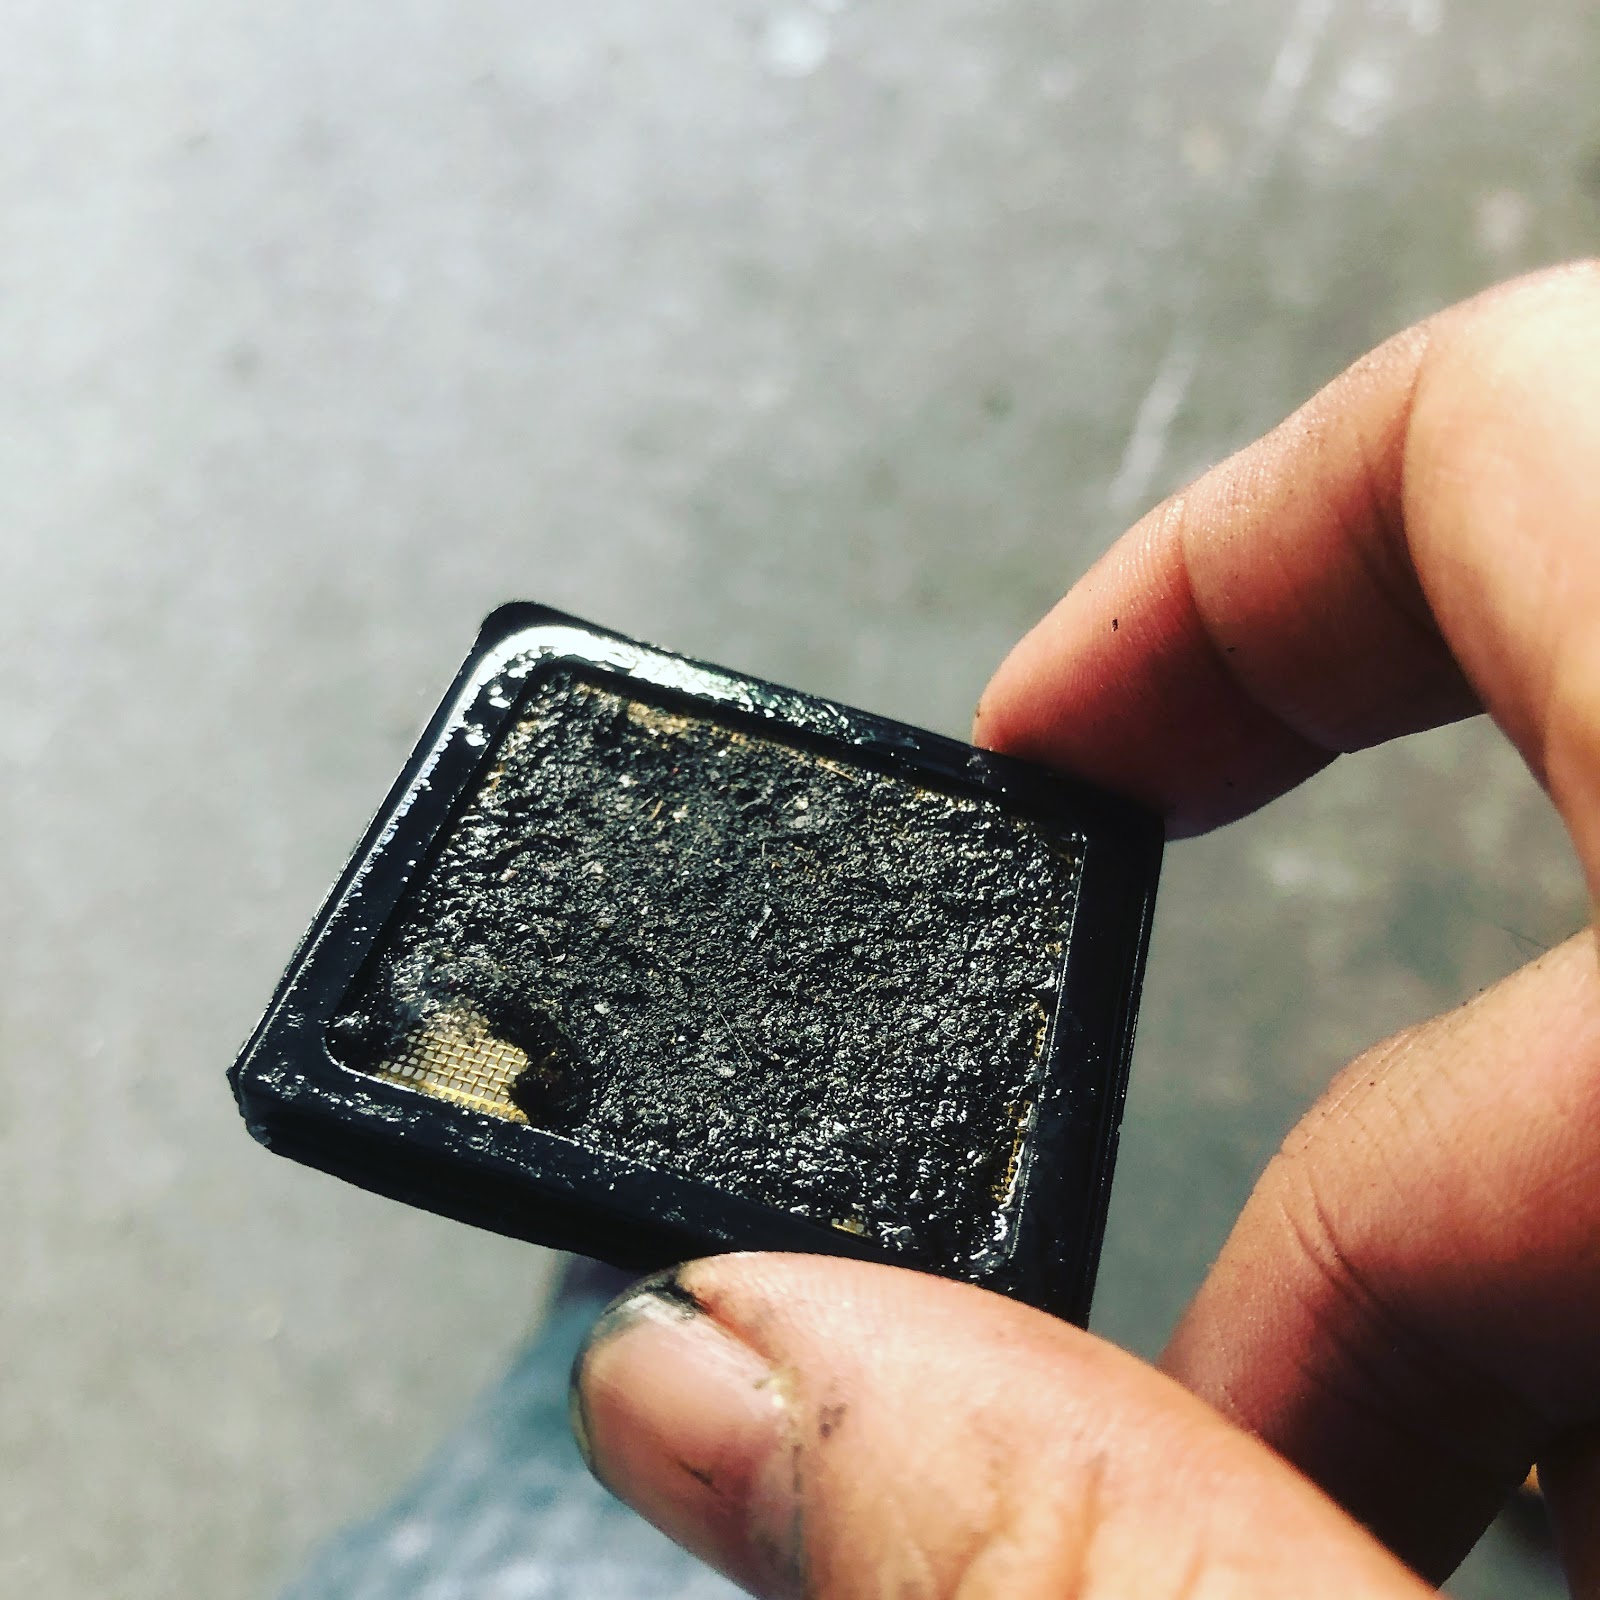
Between coats, I changed Ivy's oil (but not the filters).

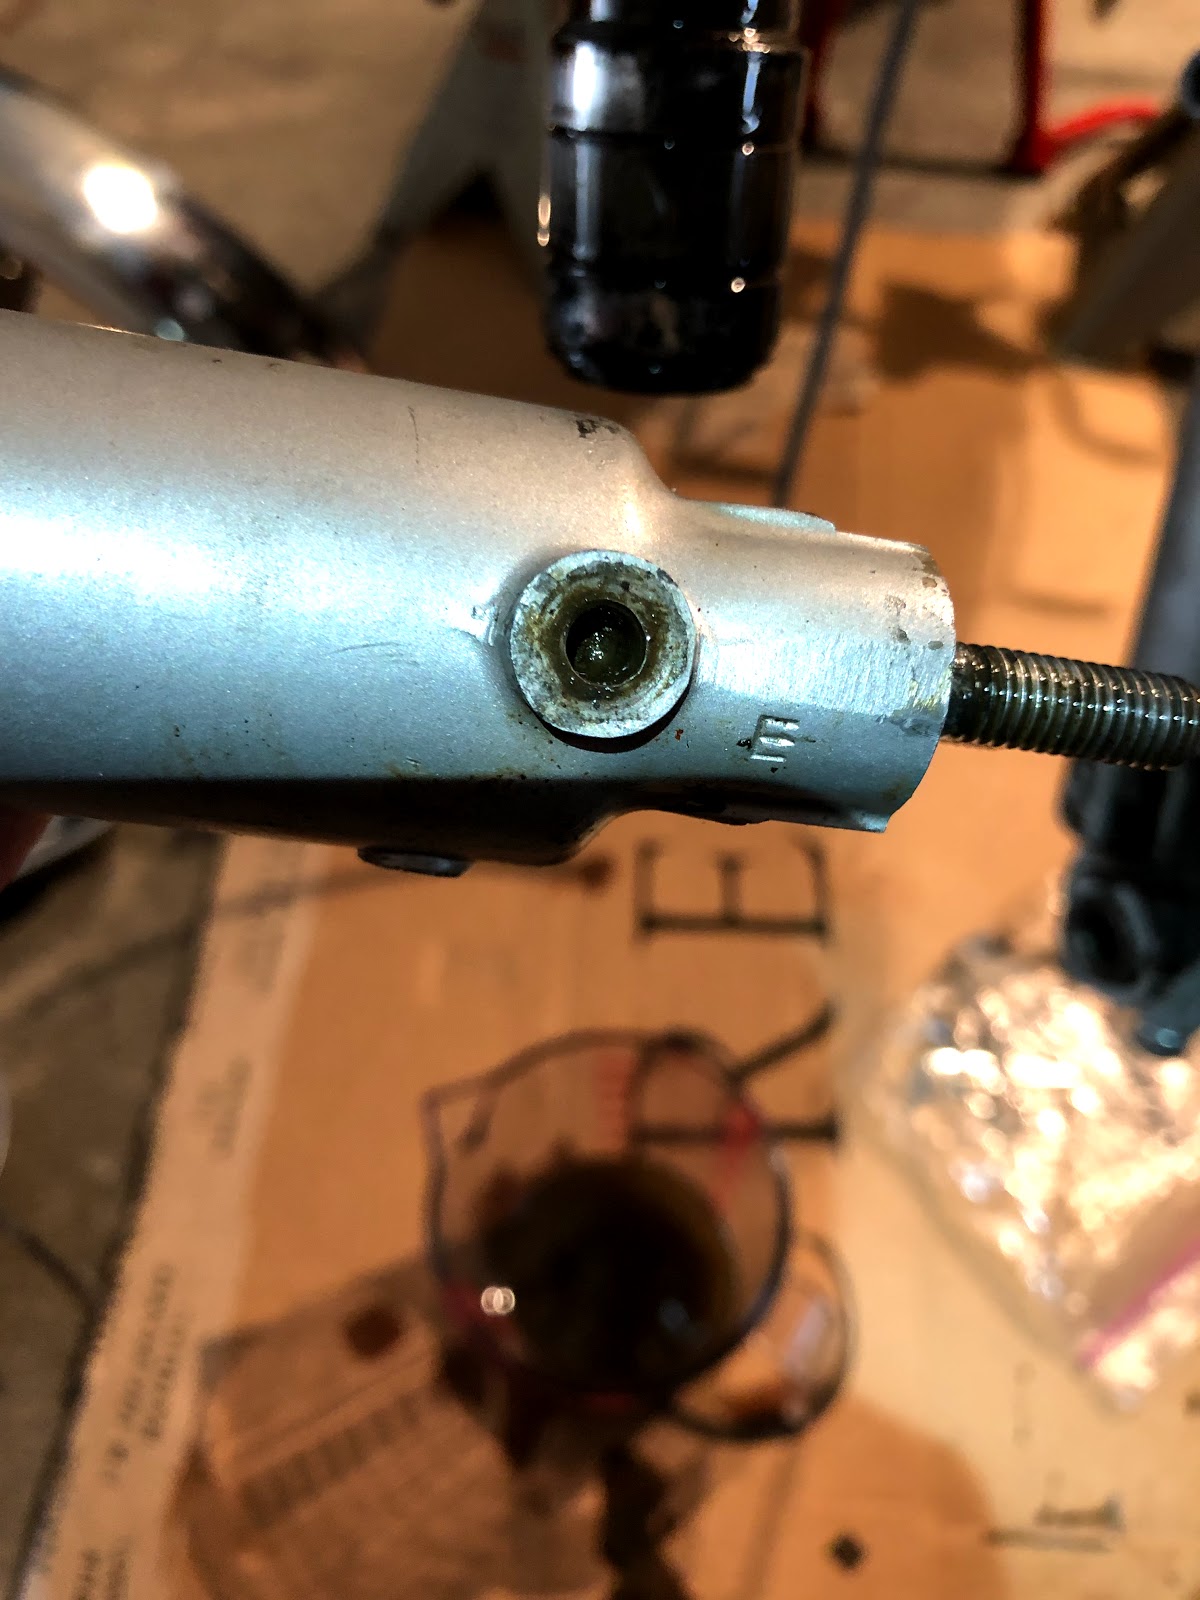
Then back to Red... went ahead and added 125 mL of fork oil on each side.  In doing that, I haphazardly went about torquing both the fork bolts and the main steering bolt.  No issues there but realized immediately after that something was wrong and that the forks were not moving at all.  They literally seemed frozen in place.

Tried to reset at that point.  Drained the oil from both sides (the left side drained in a solid stream, but the right only dripped, not sure why yet).  That changed nothing.

Added in the jack stands and started unbolting the forks themselves.  Got the left side undone from the fender and axle and found it moved fine.  Undid the right side and realized that was the one that was causing the problem.  I could get it to move but only with a lot of effort and it would keep getting "stuck" in place.

Undid the lower fork bolt but it was only when I undid the top bolt that everything came loose and started working again.  I must have torqued it all out of order and caused some kind of bind.

Redid everything in the right order and problem solved.  Added back about 100 mL on each side (forgetting that the right side probably still had a bunch stuck in there).

And I thought that was gonna be the hard part of the day...


Then a kind of summit fever hit.  Realizing I was so close to being done, I decided to push for getting the tank installed and petcock hooked up.  There was still more than enough daylight to get everything done and take her out for a maiden run around the block.

Chain of events went something like this...
  • The tank dropped into place nicely.
  • Installed the dual-inlet petcock, no problem.
  • Ran a 3/16" line from the vertical inlet to a gas catch.  Thought maybe I should do the secondary inlet, too (and lucky I did)
  • Poured a cup of gas into the tank (petcock still closed) to test whether I had any leaks out of the base of the petcock itself.  So far so good...
  • Turned the petcock on and here's where all the trouble started.  With the petcock on, I got flow coming from both lines, which I was not expecting.
  • I thought, no problem, I'll just run the secondary inlet to the actual plugged side of the tank and essentially render it closed, but when I did that, I stopped getting flow from the main inlet.  I think it must create a vacuum lock or something.
  • This is exactly the point I should have stopped, packed up, and thought through the problem carefully, slept on it and come back the next day.  Instead, I got stubborn and all kinds of impatient.
  • I tried a couple more combinations hoping to find a way to get flow from just a single inlet, but nothing doing.  Should have been a little more thorough with testing because now I can't even remember exactly what I tried.  Plus, I only tried it on Reserve.  Maybe on plain "On" it would have worked???  I just didn't have enough gas in the tank to try it.
  • So instead of stopping, I thought I'd try to hook up the old single inlet petcock.  But made a gigantic toxic mess as I tried to somehow detach the dual petcock without spilling the remaining gas all over the place.  
  • I succeeded in getting the single inlet one on... only to realize that it was that it was so wide that you couldn't mount the tank with it already installed.
  • That's the point I called it a night.  Made even more of a mess trying to slosh out the remainder of the gas into a bowl.  Screwed the single back in and left the tank open.
  • Ended up smearing some paint on the bottom left of the tank and all the gas dripping out basically melted away everything on the right side near the petcock.

Lesson(s) learned.

First lesson: I should have done ALL of this petcock testing before painting the tank.  That was just plain hubris.

I should have been more patient when first testing the dual-inlet.  I would have realized I could have tried the "On" because obviously that would NOT have required gas flow from secondary inlet!!

I did end up ordering a single inlet as soon as I got back up, which is probably the right way to go anyway.

Do I fix the paint while I wait for it to arrive, or not even bother till I test everything completely?


Friday, July 27, 2018

Summer Session #5: Epic Paint Day Three


Had been both looking forward to and dreading this day, as I was eager to get the bike back together but wasn't sure how smoothly it would go.

Started with clear coat on the frame, bridge and steering head.  The clear coat actually needed an hour to dry to the touch (and a full 3 before handling, supposedly).  Let it dry for the hour and busied myself getting the empty motor together.

Used the Monkey crankcase, the CT90 jug and cylinder head, the Sheng carb and a newly arrived K&N vent filter.


Then, finally, got started on the re-assembly.

  • Thought I was smart by first installing the brake pedal so that when I then added the main stand and spring, the spring could already wrap around the pedal and I wouldn't have to jam it in later.  But that was the first mistake, because the free-swinging pedal caused all kind of havoc.  In the end, put a pretty huge scratch in the main stand paint.
  • Added back the swing arm.
  • Then the cushions... but realized I had forgotten exactly how the various washers had originally been arranged.  Just went with what seemed right.
  • Added the rear wheel.
  • Steering head assembly
    • This was a nightmare.  My biggest mistake was trying to do everything with the forks still attached to the wheel.  I had forks flopping around all over the place as I tried to get the steering head back in place.  
    • Fork slipped and put a very nasty gash in the top of the tank.  Good thing that was the test tank otherwise it would have been a very, very bad day...
    • Also forgot to put in the metal fork caps until after I'd already put the steering into the frame once.
    • Added moly-B to the top and bottom races.
  • Very, very precarious trying to get the steering back into the frame.  Need to figure out a more reliable way to hold the bike steady in order to lift the front up enough to get the steering column in.  As it was, I was trying to balance the bike in one arm and get the steering in with the other.  Very nearly toppled the whole thing over.
    • Realized that what I really should have done was to add in the steering head FIRST!  Then add the forks, then add the wheel.  Which is all probably already documented!!!
  • Added the steering head top (had to run back up to get the pin wrench).
  • The forks were falling so far short of the bridge that I was sure I'd done something wrong.  But I used the long bolt to snag one and dial it up.  Then was able to pull the other one into place and bolt it in.
  • Added the handlebars back.
  • Laid the bike down and mounted the mocked up crankcase.  
  • Then seat and tank.
  • Finally the headlight but the mounts are so fiddly that I'd rather just replace them.  Inserted a bolt without a nut and that seemed like it would hold them temporarily.


Wednesday, July 25, 2018

Summer Session #3: Epic Paint, Day One


Was in the garage at 7:00 am! 

Setup the "shop" in the corner in front of the old trash chute, using the TV box to good effect.

First up was a full disassembly.  Dropped the engine, then used the bamboo pole resting on the jack stands to hold the bike while I removed the front end.  Then pulled the rear wheel and finally the swing arm and stand.

Worked the frame with 100 grit for most spots but switching to 80 grit especially for the areas that had the old masking tape on them (which turned out to be as hard to sand down as a bad rust spot).

Thought I would prime the frame using the single can of red primer, but immediately realized it's no good to prime something in the same color it already is - impossible to see what you're painting vs what's already there.

So started in with the white primer (everything Dupli-Color) with the frame upside down.  Went on smooth and no running.  After about 4 coats on the underside, I set the frame aside to dry for the recommended 30 mins.  Had also primed the battery cover.

In the meantime I had already lightly sanded down the brake stay, swing arm, stand, and chain cover.  Again, realized that trying to paint them an ever-so-slightly different shade of red was tricky because it was hard to see what you hit and what you missed.  Probably should have hit everything with a layer of white primer just to give it some contrast...  But anyway, finished the parts with 3 coats of Ford Red while the frame dried.

Had wanted to disassemble the front end, both so I could paint the steering head but also to swap out the fork springs.  But couldn't get the forks to budge an inch!  Decided to leave it for another day...

Set the parts aside to dry (paint needs 60 mins) and started priming the frame right side up.  Did another 3-4 coats and then set that aside to dry.

Decided the only way to really do this right was to leave everything overnight and resume again in the morning because it would take much to long to try to reassemble only to have to not only disassemble but then re-tape everything the next day.

Goal is to get the frame painted tomorrow and clear coat all the parts (short day due to musical theater performance).

Then clear coat the frame on Friday and finally reassemble.