Got new hardware in the form of Dime City Cycles levers and grips (with throttle included). Installed those on the 7/8" handlebars from Bike Bandit (all the Dime City stuff fit perfectly!).
Wanted to get a real feel for the ergonomics of the grips, and realized I couldn't really do that with the stock seat. So I got the other seat pan (which is actually the wrong year/model and doesn't mount correctly at the front) cleaned it up and gave it a quick coat of paint. Sitting on that gave me a better idea of how things would look and feel.
One thing I realized is that the bike MUST have rearsets to make the whole thing work. Your knees would just be too high up if you only changed the handlebars and seat height. Unfortunately, rearsets will be the trickiest thing to install as mounting holes would almost certainly have to be drilled.
I have to say, she looks good in this cafe racer trim...
A comparison of the stock handlebar setup versus the cafe setup. I still think these cafe bars are too wide at 30". They're actually wider than the stock ones.
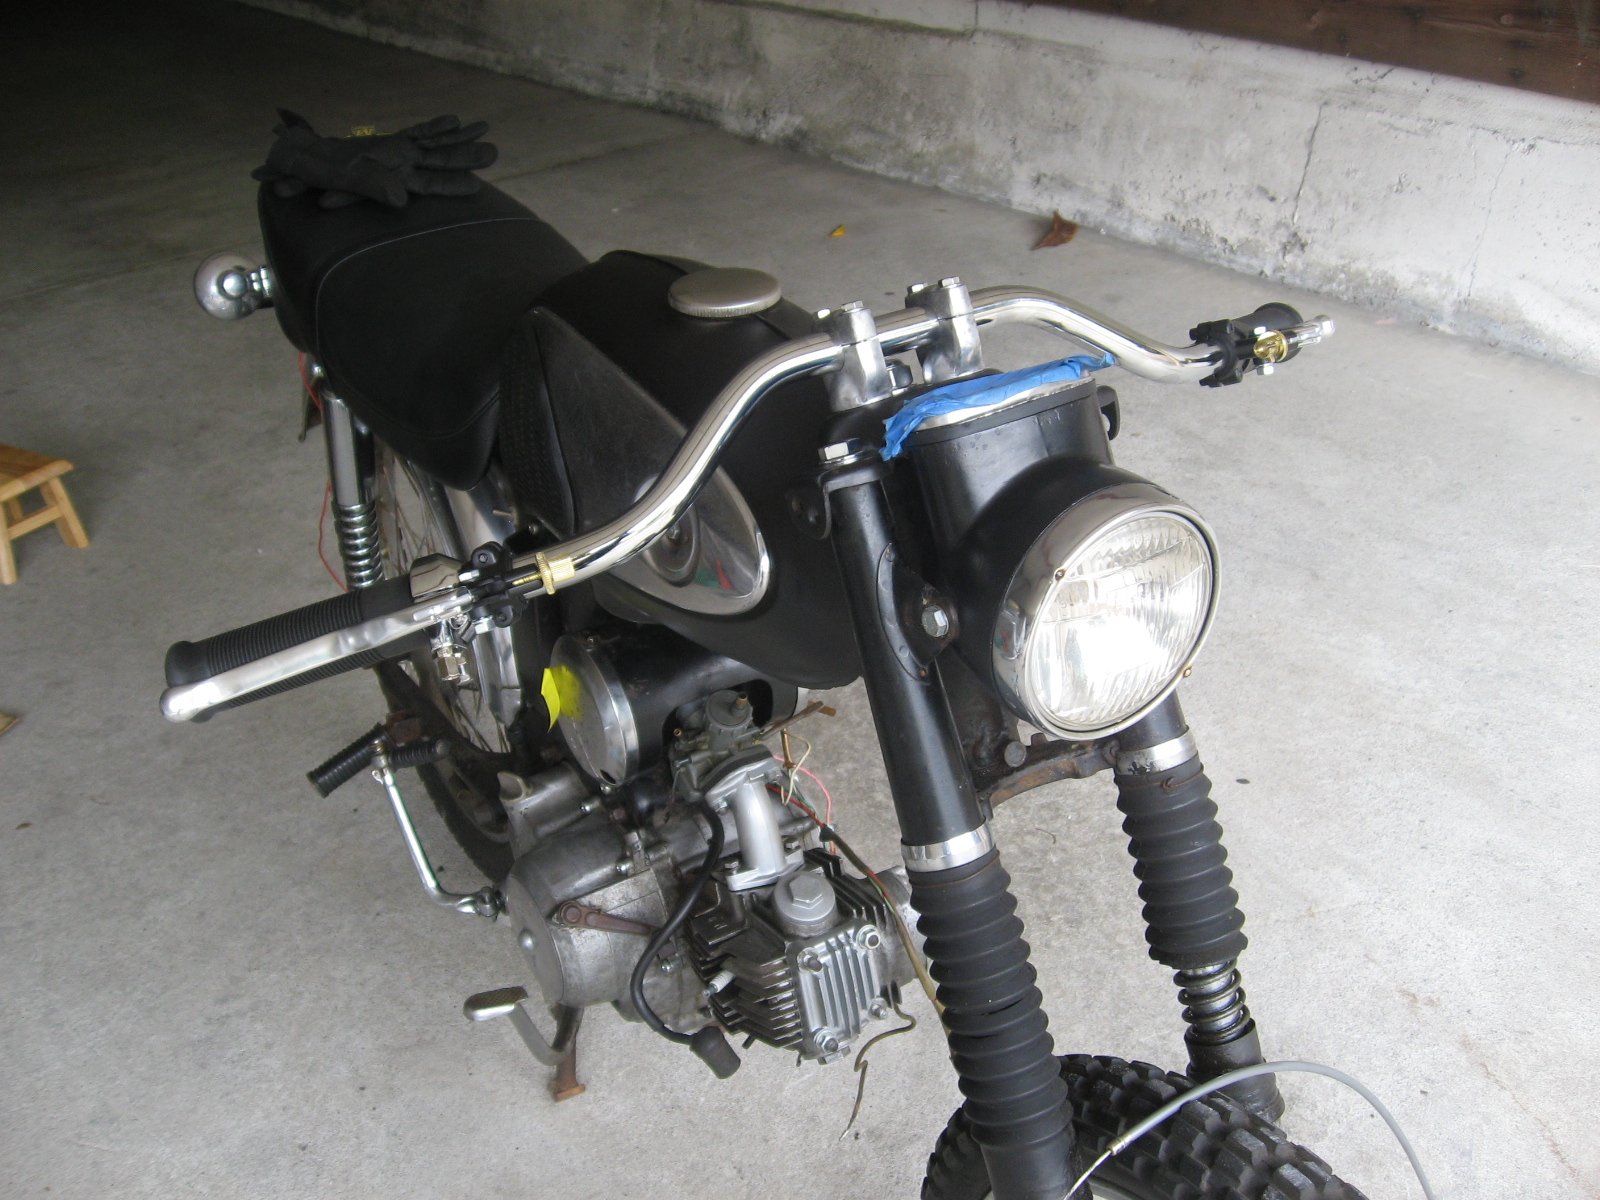
Some detail of the Dime City hardware. Not that I have much to compare it to, but I thought the fit and finish were great for the price. The lever set was only $20, and same price for the grip set with throttle body. Both are Plain Jane, OEM-style hardware, though. Down the line, I'm sure I'll end up with something snazzier.
Showing posts with label s90. Show all posts
Sunday, July 14, 2013
Friday, July 5, 2013
S90: Major Milestone
Hit a major milestone today by dropping the engine out of the S90 for the first time. Everything went pretty much "by the book" according to Clymer's, with no real surprises. The only hiccup came when I couldn't get the engine lined up to the mounting holes for the re-install. Then I realized everything would be a lot easier with the bike lying on the ground instead of standing up. Once I laid her down, I got the engine installed in about 30 seconds.
The whole exercise took about 2 hours, so now that I know what I'm doing I'm sure I can do it much faster next time.
First the drive sprocket had to come off. Had to re-slot these screws and then hit them with the Lisle. I don't really understand why you have to remove it just to drop the engine, though.
Detach neutral switch.
With all 3 engine mount bolts removed (plus the clutch, alternator, air box, muffler, carb, and gearshift) - everything drops right out.
Doing research after the fact, I learned that the ignition coil is supposed to be mounted to the top of the engine. Clearly it's not. I think the PO mounted it to the top of the frame where the winker relay is actually supposed to be. Not sure why, but assuming it's another of his trail mods.
Engine mount bolts.
Years of accumulated crap.
First ever look at the rectifier.
Getting the engine back in the easy way.
Labels:
1969 S90,
bottom end,
restoration,
s90,
top end
Sunday, June 9, 2013
S90: Nooks and Crannies
Tried to see how much I could clean the cylinder head using only Dremel brushes (as opposed to trying media blasting). As expected, the Dremel could reach 90% of the surfaces, but some were just too deep or at odd angles to be reached.
May need to come up with other creative solutions to get to the hard-to-reach spots (like between the cooling fins).
This is prep for painting...
Some before pics...
And after...
May need to come up with other creative solutions to get to the hard-to-reach spots (like between the cooling fins).
This is prep for painting...
Some before pics...
And after...
Labels:
1969 S90,
metal polishing,
restoration,
s90
Sunday, June 2, 2013
S90: Odd Jobs Continued
Another day of just messing around with whatever stuck my fancy.
Set the points gap just for fun.
Removed one valve just to test out the new (replacement) valve compressor.
Painted the intake. Broke in the new Dremel 3000 to prep the surface.
Why are these different lengths?
Set the points gap just for fun.
Removed one valve just to test out the new (replacement) valve compressor.
Why are these different lengths?
Labels:
1969 S90,
painting,
restoration,
s90
Sunday, May 26, 2013
S90: Odd Jobs
Another session doing odd jobs and generally getting my head back into the bike. Eventually ended up painting the battery cover, opening the oil pump for the first time, doing a compression test, and removing the clutch for fun (will actually disassemble the clutch next time).
Didn't do as much sanding prep on the battery cover as I should have. The result came out a bit rough, but the main goal was just to get a coat of rust preventative on it.
Compression test came out to a whopping 35, but again, the only point of this academic exercise was to open the compression gauge which was still in its plastic box after all this time.
Popping off the oil pump cover. Luckily the Lisle impact driver got all the screws out. I'd have been out of luck if any of them stripped because I still haven't bought a new Dremel since the old one got stolen.
Sunday, November 25, 2012
Sunday, October 28, 2012
S90: Cast Coat Aluminum Paint
Finally found a good engine paint that just mimics good clean metal: Dupli-Color DE1650 Cast Coat Aluminum. I painted part of the chain cover on the CM91 along with the head cover on the S90. Very happy with the results.
Some Before and After on the CM91's chain cover.
And the S90's head cover.
Some Before and After on the CM91's chain cover.
And the S90's head cover.
Labels:
1969 S90,
metal polishing,
painting,
s90
Subscribe to:
Posts (Atom)

