Friday, August 30, 2013

Roxy: Fuel Filter Fiasco

It's hard to know when to follow the old mechanic's adage of "If it ain't broke, don't fix it."

Just to keep the carburetor as clean as possible, I figured I could at least tackle the seemingly easy job of replacing the fuel filter, since the one that was on the bike was looking pretty aged.

This is basically how it went...

  1. I ordered 2 different kinds of fuel filter online, plus clear blue fuel lines in 1/4" and 5/16", just to be safe.  One of the filters was the same K&N that was on the bike (so I thought).  And the other was a brass 90 degree version that I thought may come in handy if I had to use the original carb with the fuel line on the opposite side of the petcock.
  2. Finally had a nice long afternoon to do the work.  Started by cutting off the old rubber lines since they were stuck way too tight to get off any other way.  Everything came off quickly and easily.  On closer inspection, the old filter definitely looked liked it needed replacing.  But it was all downhill from here...
  3. Immediately realized that the 1/4" fuel line was way too big to fit either the petcock valve or the carb gas valve.  I thought I could snug it up and make it water-tight by simply using a hose clamp.  I was wrong.
  4. Also, the K&N filter that I thought would be a direct replacement was actually longer than then one I had, making it much to long to fit between the petcock and the carb.
  5. My long relaxing afternoon in the garage suddenly became a race.  First, went to the hardware store, hoping they had polyurethane hose smaller than 1/4".  They had vinyl tubing that small, and also a polyurethane one but it was thin and stiff and not suitable for the bike.  No luck there.
  6. Went to the auto supply store since I had to grab filters as well.  I got two simple brass ones.  At first I thought they were sold out of 3/16" line, but luckily they carry it in the back and you can just get as much as you need.  I got 4' of their black rubber fuel line.  Small ray of hope that the day would get better...
  7. Race home and try to pick up where I left off, though now I only have 30 minutes left to work so I'm scrambling.  Scrambling and fiddling with fuel lines isn't the greatest combination.
  8. Replacing the lines and filter was actually fairly straight-forward at that point.  Got everything tight and leak-free.  Finally, time to start her up...
  9. ... and she won't hold idle - again!!  Not sure why this problem always surfaces anytime I touch the carb.  She's been running just fine for days now.  The only thing I'd done was run gas through the carb.  I can't see how that should affect anything about the idle.
  10. But I did notice that my jury rigged choke handle gasket had basically fallen apart.  I figured maybe that was the problem, but then again, had it been fine on all the long rides in the past week and only fallen off today??
  11. Left the garage and couldn't get back to work for a few hours, and I was losing daylight.  Under the gun, yet again.
  12. At this point, I figured I had nothing to lose, so why not try installing the original carb that I had cleaned and rebuilt?  This carb had the fuel valve on the opposite side, so I had to install the 90 degree filter.  After getting everything swapped, I crossed my fingers and opened the petcock.  
  13. Everything seemed to be holding together... until gas started leaking from where the bottom joins the top.  The gasket didn't quite fit the dimensions of the bowl, but I thought the fact that it was squeezed tightly would keep it water-tight.  Guess I was wrong, again.
  14. So now I think I'm stuck with the first carb, but I should really install the proper choke handle gasket, just to eliminate that as the possible air leak.  I was hoping I could get the choke handle off with the carb still on the bike.  But I hit the same problem I did on the other carb - the end of the handle was so deformed that it wouldn't pass through the hole.  
  15. So I pulled the entire carb off, and just like I did on the other one, I tried to file the tip down so that it could pass through.  But it was already dark and I was working with just a headlamp now.  As much as I filed it down, it still wouldn't pass through.  I finally had to abandon that strategy.
  16. So the carb goes back on, and I concentrate on trying to make a better jury-rigged gasket.  I ended up using a small section of the rubber hose, cut to fit snugly into the gap.  I also spread petroleum jelly around the contact surface hoping to improve the seal.
  17. And started her again... and actually got a weak, but steady idle.  Was happy enough to leave it at that.  And I'm still left with the question of whether I really should have bothered switching the filter in the first place.


The old setup.


Funnel to catch gas from the drain plug.


 The old filter on the farthest left, and the 3 others I had to choose from before the trip to the auto supply store.  The simple one on the farthest right was in the box of parts from the PO, and I didn't know how much use it had already seen.


Testing with the 1/4" lines that ended up leaking.  Nice clear blue lines, though.  Will probably end up ordering them again in 3/16".


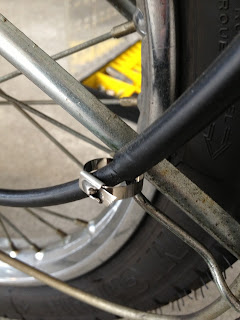
And the final setup.  Not very pretty.  Though I did eventually swap the hose clamps for the wire fuel clamps.


Thursday, August 29, 2013

Roxy: Key Pad

Happened to come across this red round material that's meant to help you grip jar tops when you open them.  Perfect size and fit to serve as a pad so the other keys on the chain don't rub away the paint.  All I did was cut a hole in the middle and attach it with some double-sided tape.  Go figure...


Roxy: Odometer Log - 17,567


Calculated that I'm getting 58 mpg on these short hops around the park.

Sunday, August 25, 2013

Roxy: Odd Jobs

Sunday morning odd jobs...


Switched over to the Tactical Tailor medical utility pouch, which was slightly bigger and therefore a better match to the left side pouch.


Cut the template for the key guard.


Cut off the old green rubber from the left side footpeg, and then replaced it with a wrap of 3M outdoor strip.


Replaced nuts and bolts on the horn mount.


Torqued the lower fork, upper fork, and steering stem nut.  Gave me the chance to use the new 29mm 1/2" drive socket (which is the only thing it's used for on the bike).


Going to ride with the switch attached to see how well it works in this position during real riding conditions.  Also realized that there's not enough space to fit the wire bundle through the back of the headlight.  Fitting the winker mount inside would probably have been a tight fit anyway, so maybe everything has to go into a saddlebag temporarily.


Put a shine on the rims using WD40 and tin foil.


Wednesday, August 21, 2013

Roxy: First Oil Change [17,541]

Changed the oil for the first time.  Ran her for about 5 minutes and then cooled for a few more minutes after that.  Refilled her with about 700mL which put the mark about halfway between the two lines.  I'll have to check again after the next long run.


Using a cheap strainer to catch the bolt when it drops.


The edges of the hex seemed a bit worn, as you'd expect, but otherwise everything seems in good shape.


The old stuff.


Tuesday, August 20, 2013

Roxy: Odometer - 17,541 (+135)


After a couple of GGP rides, including today to Stow Lake.  Reminder: put her back into Neutral after parking!

Roxy: New Bag

Forgot I had this coyote Tactical Tailor bag ("zippered utility pouch").  Fit was perfect and I like that I could put a lock on the main compartment.  The small external pocket is handy, too.  Think I'll switch over to this one - and probably get another one for the other side.


Monday, August 19, 2013

Roxy: Nothing Worse than Intermittent

There's nothing worse than a problem that is sometimes there and sometimes not.  After spending an hour last night where the bike would not hold idle for more than 10 seconds, today she idled strong off a cold start and never even wavered.

The one thing I did was I jury-rigged the choke handle lever back on using electrical tape followed by a zip-tie.  But with the engine running, I pulled it off to see if that caused an air leak, but the engine continued to idle strong.

The only thing I can think of is that overnight, the stoppage in the slow circuit dissolved away.  But if that's true, it means it could come back at any time.  I should change the fuel filter and clean the air filter just to be safe.


Not pretty, but I'll put a good one on eventually...


Roxy: Minimalist Toolset

Stubby Philips, stubby slotted, and a small adjustable wrench.  Fits in the toolbox and probably covers 90% of anything you'd have to do on the road.  Brilliant.


Sunday, August 18, 2013

Roxy: Not So Fast!!

Arrrghhh!!  Starting her up again today and she won't hold idle anymore!  I rode Golden Gate Park yesterday and she idled beautifully start to finish.  But now I'm getting the exact same exact symptoms as before.  I repeated my steps from Friday to clean out the slow jet and circuit, figuring maybe it just got clogged again (in which case I'd know I'd have to replace the filter).  But even after a cleaning, there was no change.

Again, I tried messing with the screws, but it was either a weak idle, or a racing one.  There never seemed to be anything in-between.

Troubleshooting brainstorm:
  1. Maybe it was the long ride yesterday that actually just gunked up the circuit again, maybe more than just the WD40 spray could fix.  Maybe I should replace the filter, clean the circuit out yet again (I just realized I didn't spray out the air screw hole), then if she holds idle after several rides, I know it was gunk from the tank getting through the old filter.  I guess if I clean out the air screw hole (thereby repeating ALL the steps from Friday) and she at least holds idle for awhile, then that would prove that it's just getting gunked after a long ride.
  2. I noticed the rubber gasket on the choke handle was ripping off.  If that creates an air leak, then there's my problem right there.  Wondering if I can temporarily seal it with vaseline just to test it.  But then again, I think it was ripping this whole time, so surely it was in bad shape even for yesterday's ride (in which case, it has no effect on idle).
  3. Replace the kinked throttle valve spring.  It's possible the weak idle is just a bad setting of the screws.  Maybe when it races, that's the correct screw setting, and maybe it's the racing idle that should get fixed.  The racing idle could be a sticky slide.  But then again, she ran fine yesterday.
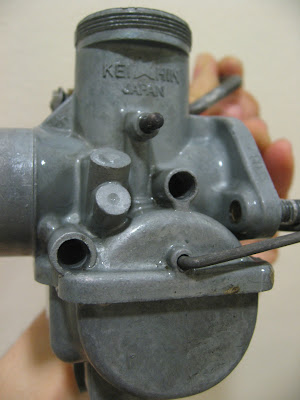
  4. I prepped the original carb (labeled S90B) that I cleaned yesterday with new parts from the Keyster kit.  I can swap it out, but since I might need to cut the old fuel lines, I should be ready with new tubes and a fuel filter.  One difference is that the S90B has the fuel line on the opposite side of the carb body.  Just for reference, Viola's carb is labeled CS90C.
  5. Finally, I'll just try pulling the current carb (labeled S90K1E05) and give that a thorough Pine Sol dip.
  6. It may also not be the carb at all, but rather a faulty advance unit.  But given that the problem was intermittent, seems like it must be the carb?

Here's Roxy's original S90B carb cleaned, rebuilt, and ready to go.  I took the intake (the one I painted), gasket, and insulator Viola's carb.  From the Keyster kit, I used:
  1. air screw
  2. throttle screw
  3. slow jet
  4. main jet
  5. bowl gasket


I also replaced the intake gasket (finally opened the gasket set), hoping it could be a simple air leak, but no luck there.


Roxy: $4 Screws

Want to know what a $4 screw looks like?  Well, it looks like a JIS 3x8 tank badge screw.  New one is on the left, old one on the right.  Was it really worth the $16 to replace them? 


A few pics of the one footpeg rubber I have left.


Replaced plastic zip ties with nifty stainless steel ones.  But I only used them in spots where they hung a little loose.  For spots where you have to snug them up tight, I was worried about how I'd ever get them off again, given that only tin snips can cut through them.


Friday, August 16, 2013

Keyster Carb Rebuild Kit

Photo reference.  Everything you get in a Keyster kit.  Fourteen pieces (if you count everything on the float set as one thing).


So far I've used:
  1. Bowl gasket (in Roxy's "C" carb)
  2. Throttle screw spring (in Roxy's "C" carb)
But also added back a throttle screw spring from eBay I'd bought awhile back.

Roxy: Pine Sol Soak

Since my head was into carbs, I decided I may as well attack the gunked up original Keihin carb that came from the PPO.  It was such a mess that the two halves wouldn't even separate.

Bought a big jug of Pine Sol and just dunked the whole thing, letting it soak for 2 hours.  The pictures pretty much say it all.  The Pine Sol worked miracles.  Now I'm thinking I could use the same technique on some of the other engine parts, maybe even the bottom end.

Unfortunately, I found the float pin wouldn't budge.  I know you can try to knock it out with a punch, but since the posts are easily damaged, you have to support them and do everything very carefully.

Also, the intake o-ring had been sealed into place with some white rubber cement type substance, which was used in a lot of other places to seal gaskets. 


Before...


Two hours in a Pine Sol bath.


And after...


Roxy: Mechanical Milestone

All right, so I did fix the brake lights earlier, but let's face it, that was an electrical issue (and a rather simple one at that).  This time we worked on the carb - perhaps not true "engine work", but certainly another significant baby step toward the goal of a complete engine overhaul!

During yesterday's ride, I noticed that problem again where she just wouldn't hold idle.  She was good for about 10 seconds before before stalling. I rode the whole loop through Golden Gate Park feeding her throttle the whole time.

I checked a couple of easy things that night.  Battery voltage was still good at 6.4V.  Also, I tried using the air and throttle screws to see if that did anything.  It barely had any effect.  Based on a lot of reading on the S90 group, that symptom pointed to a clog in the idle circuit.  (For reference, the screw settings were 2-1/4 out for air, and 3 full turns out for throttle).

So today, I actually opened the carb up.  Was a little nervous, despite having opened and dismantled the carbs on the other bikes dozens of times.  Again, it's different when you're working on the bike you actually ride versus one that just sits in place.


A reference shot of the screw settings.


The drain screw comes out.  After the gas had drained from the bowl, I realized that there was still plenty of gas left in the filter and I realized it was being held there by vacuum.  Next time I suppose I could run the engine with the petcock closed and thereby drain it completely.


Inside, the carb is actually nice and clean.


And here's the culprit, the slow jet.  I couldn't see daylight down the length when I first took it out.  Also noted that these are definitely not factory.  And they didn't even have a size on them.  I suppose it would be nice to clean up the original carb and get it back in, but then again, if this carb works with this engine, maybe there's no need to muck with it.


Pine Sol soak for a few minutes, followed by WD40 and then air.  While that was soaking I also checked the entire slow circuit by doing these 3 steps:
- with the air screw removed, shoot WD40 into the inlet and it should exit through the screw hole
- with the screw back in and the slow jet removed, shoot WD40 into the inlet and it should exit the slow jet hole
- cover the slow jet hole with your finger and shoot WD40 into the inlet and it should exit into the chamber


All back together, and then the moment of truth.  Took a couple of kicks to start her and I was sure I'd buggered something up.  But then she fired, and wouldn't you know it - SHE IDLED!


And in conclusion, don't run in Reserve unless you have to!!!  I think that's how it ended up clogging in the first place.