Saturday, July 27, 2019

Red: Wiring Cleanup

Big wiring cleanup day.

Using a hot-off-the-press color coded wiring chart, started by putting fresh labels on everything (and fixing a few that were mislabeled).

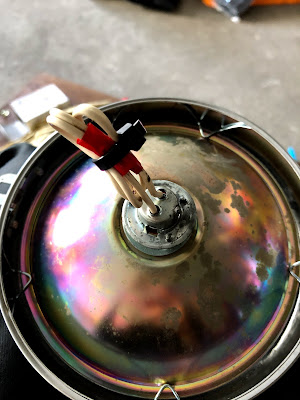
Popped open the headlight to find tons of usable space.  Moved all the front end wiring into the headlight, except for the speedo wiring because it was a thick bundle and just naturally flowed back to the box.  But now all the other power and ground wires are housed inside the headlight.  Looks much cleaner.

Then also ran a new wire from tailight into the battery box as a ground wire.  But this one is now solidly ground into the fender bolt.  This means I can dump the alligator clip ground that was never confidence inspiring in the first place.

Feeling very solid with the entire loom now.  One last improvement will be adding some kind of terminal block instead of the jury-rigged bullet connectors.


Friday, July 26, 2019

Red: Low Volts

Came down and flipped on the switch and voltmeter was suddenly reading about 5.25 volts even though I knew the battery should still have 6+.  Tested the battery on the multimeter and sure enough, it was 6.25V.

Tested the voltmeter itself direct to the battery and it was reading correctly, too.

After a lot of testing and extremely unhelpful posts on both Yahoo and Reddit, I realized that the voltage was fine until I connected the coil, then it would drop low.  Disconnect the coil and it would go back up.

Also, letting the bike idle and then trying again sometimes put it back to full volts.

Another clue, start the engine and the volts would go back up to 6+ volts.

I feel like it's somehow related to checking the volts with the points open or closed...?


Sunday, July 21, 2019

Red: Fork Seal, Part II

Surprised when I realized I'd done a four-hour session.  Wasn't anything so epic, but perhaps I was taking my time.

Went through the now-familiar process of removing the seal unit from the right fork, but realized something was a bit off when I opened up the drain plug and nothing came out.

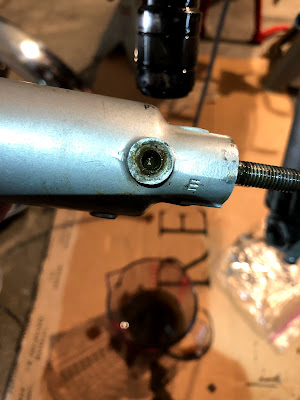
Pulled the bottom fork off and saw the opening was pretty gummed up.  Shined a light into the hole and it was completely blocked up.  Used a small allen wrench to poke around and finally saw there seemed to be not only fork muck but also some kind of residue, maybe very old gasket material.  Then used a longer bolt to clean the threads and push it out.  Sprayed the inside out with the hose to rinse it clean, then ran some WD40 through it.

Bolted everything back up and flushed it with a tiny bit more fork oil before filling it with 125mL of clean fluid.

Given how much muck was in the right, was worried same might be true on the left.  Removed the bolt and once again, nothing flowing.  Popped the bottom off and pretty much the same level of muck although no gasket residue on this one.  Just did the power rinse with the hose and the WD40, which seemed to clean it all out nicely.  Filled with 125mL.


Took a fresh look at the battery compartment.  Had hoped to use the new terminal block to attach all the positive leads together, but even though the block fit fine in the compartment by itself, once it actually had wires attached to it, it was just too clunky to fit clean.

But after untangling and sorting the wires a bit better, realized that maybe I could get away with just organizing the existing mess a bit better.  Removed the old "junction" and chopped each lead much shorter to get rid of the excess.  Also used a zip tie to lock all the positives together.

The negative bundle was the only one that attached to the battery so only those wires had to be long.  Shortened one of the kill wires and then used a bunch of zip ties to make it a little neater.

Putting everything back in, it's still a nest of wires, but when you pull them free, it's much more organized and clear where everything is supposed to go.  So good enough for now...

Still not sure why Ivy's compartment is so "empty" compared to Red's...

Also checked the plug and it was black and clean.


Monday, July 15, 2019

Wired up the voltmeter by taking hooking up the positive to the horn and grounding it to the bars underneath the horn switch.

Went right into the same mount as the speedo.  Job done.


Sunday, July 14, 2019

Red: Homemade 6V Voltmeter

Got a $10 voltmeter from Amazon (Chinese seller).  Got an error as soon as I hooked it up to the battery but immediately realized it was meant for 12V and I'd just missed that in the title.

But then realized I at least had a nice metal body and I could perhaps swap out the guts of it with one of the 6V LEDs I already had.

Getting it open was the hardest part.  Got the body off easy enough but the cap was really crimped on there tight keeping the plastic cover captive.  Basically had to rip through and destroy the plastic inner shell to get anywhere near it.

Relatively easy to 3d print a new inner body.  Thought I'd have to also make some kind of fancy mount for the LED itself but found that it was easy enough to press fit it into the rectangular opening.

Final piece of luck was getting a couple big o-rings from the hardware store.  Put a smaller one against the 3d body, then the clear plastic cover, then the thicker o-ring to keep it all in place.  Worked a treat.

Bonus was that the blue LED looked much better than the original red 12V display.


Saturday, July 13, 2019

Red: Filthy Rich

Felt like the starting issues were timing related, so checked static timing.  But got a big surprise when I pulled the plug out.  It was totally caked with dry, crusty residue, which seems to follow the needle being set from second highest.

So first, checked the timing and as expected, it was off (retarded).  Set that to the timing mark.

Replaced the plug with a brand new D6HA.

Then dialed the rear brake pedal way in.  Also pulled the brake switch wire down much farther and raised the switch itself so that the brake light was coming on nice and early.

Finally, added the grey electrical shroud to the rear wires.


Friday, July 12, 2019

Monkey Motor: Shift Drum Woes

After assembling and reassembling several times, found that the whole transmission would sometimes lock up.  Slowly chased it down to the top fork on the shift drum seemingly hitting a rough spot in the channel and getting a bit rough, which seemed to lead to the entire tranny locking.

But as these were the "pin" type drum forks, there was really no good way to get that damn pin out.  Yahoo group no help on this one, either. 

Tried sanding the channel as much as I could and stopped short of busting out the Dremel.

But then as I was playing around, I ended up removing the retaining clip, moving the fork back and forth quite a bit, then replacing the pin.  And viola, suddenly the binding was gone.  I think that by removing the retaining clip it allowed the pin to shift in place a bit so that it wasn't binding.  Theoretically...

But in the end, was worried that it may not really have solved the problem permanently, so decided to swap it for the drum that was in the Model Motor, which had a smooth action despite having a few rust spots here and there.

That seemed to solve the shift issue, but was also finding that when I tightened down the case screws, the tranny would freeze in place from pressure.

After a long process of elimination, realized two things. 

One, you need the gasket in there to account for a critical millimeter or two.

Second, the case must close flush by hand first.  If you're closing any gap at all using the screws, then it's binding on something.  Usually jiggling it a bit will help it close up.

As always, can't forget the 3 thrust washers: mainshaft, countershaft, and kickstart.


Monday, July 8, 2019

Monkey Motor: Internals

Started on the motor proper by installing new bearings.  Though I had gotten the sealed 6004 by mistake, but figured I'd drop it in for now just so I could continue working.  The 6204 was correct and went in easy.

But went to install the mainshaft and it simply wouldn't fit in the recess.  Closer examination showed there was some damage to it and the lip had sort of "curled" in a bit.  Unsure of the right way to fix, but ended up just sanding the edge down.  Didn't take much and was able to insert the shaft and it turned freely.

Close call, as that would have obviously rendered the case useless if it had been worse.


Saturday, July 6, 2019

Monkey Motor: Starting

Started work on the Monkey Motor.  Scraped gaskets using the new Motion Pro scraper tool, which worked pretty well.  Fitted the crank.


Friday, July 5, 2019

Garage: Organization Day, Unbox New Frames

Unboxed the two new frames, the black and "turquoise" (?) one.

Realized that along with the white, I know have one of each of the three versions sitting naked in the garage. 

Turquoise frame is in fantastic shape.  Super, super clean.