Got a $10 voltmeter from Amazon (Chinese seller). Got an error as soon as I hooked it up to the battery but immediately realized it was meant for 12V and I'd just missed that in the title.
But then realized I at least had a nice metal body and I could perhaps swap out the guts of it with one of the 6V LEDs I already had.
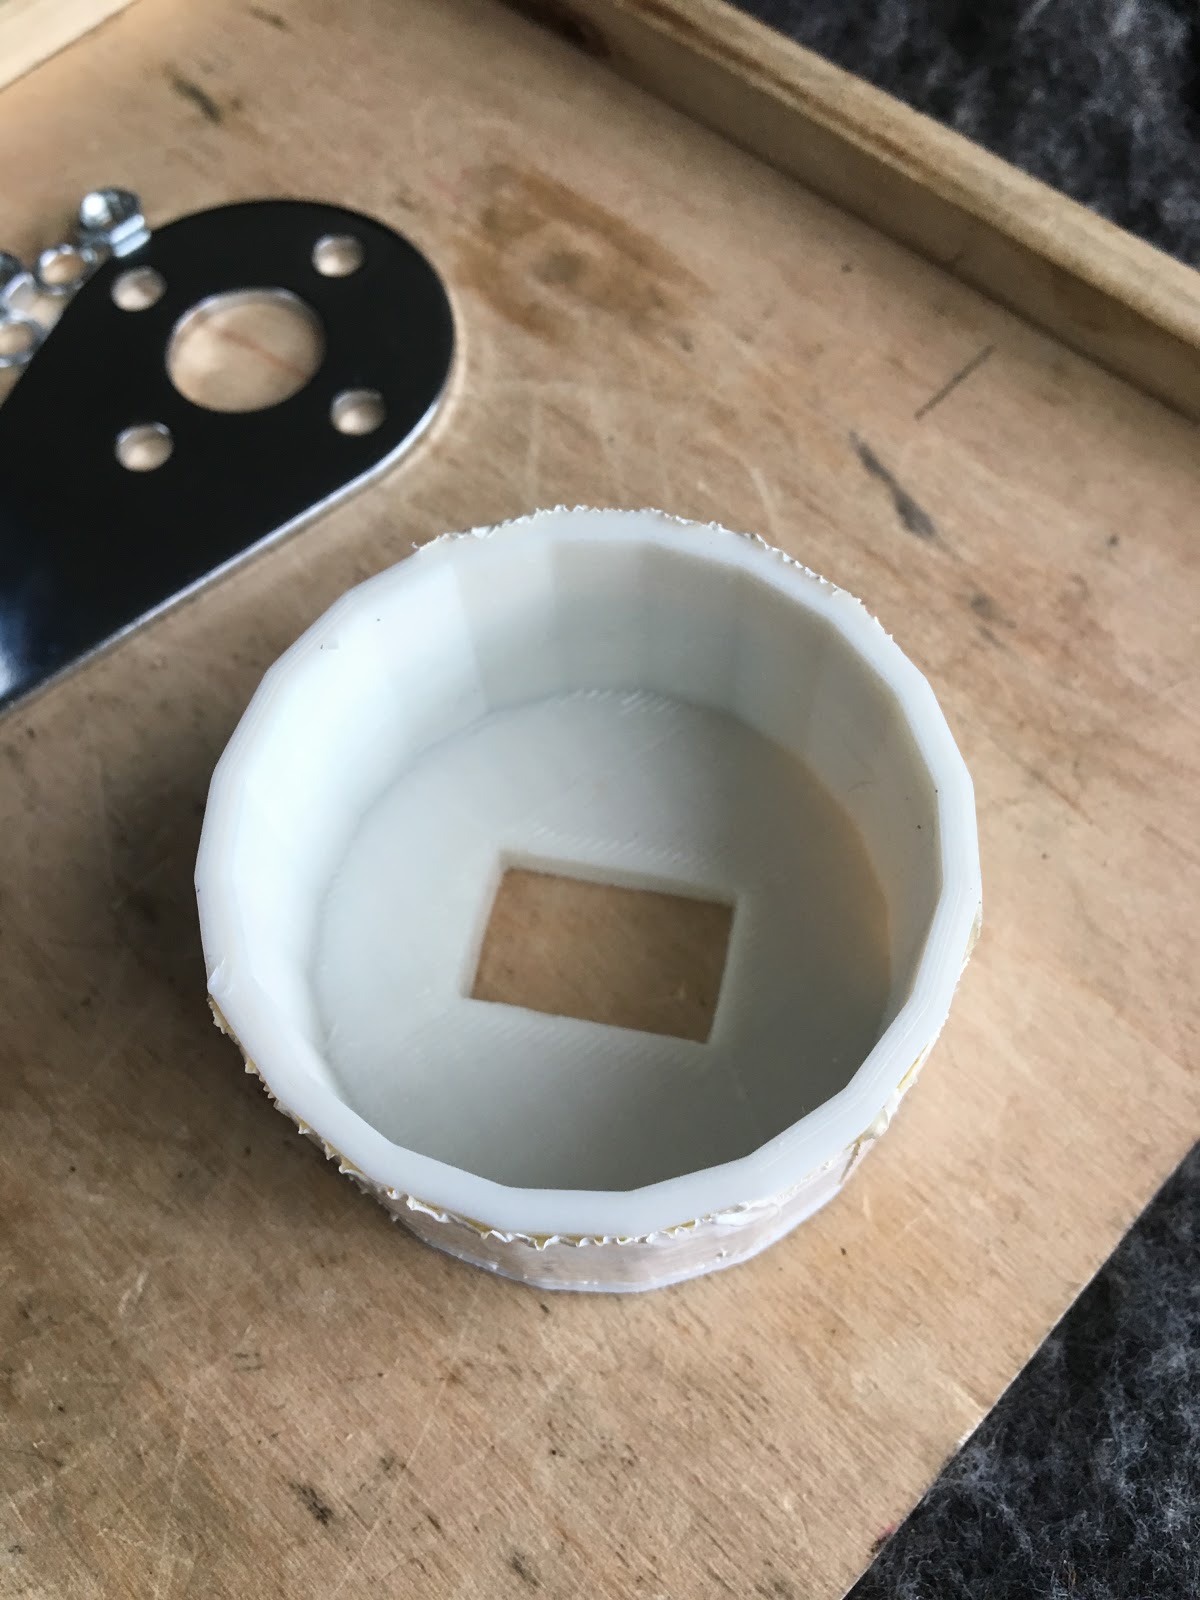
Getting it open was the hardest part. Got the body off easy enough but the cap was really crimped on there tight keeping the plastic cover captive. Basically had to rip through and destroy the plastic inner shell to get anywhere near it.
Relatively easy to 3d print a new inner body. Thought I'd have to also make some kind of fancy mount for the LED itself but found that it was easy enough to press fit it into the rectangular opening.
Final piece of luck was getting a couple big o-rings from the hardware store. Put a smaller one against the 3d body, then the clear plastic cover, then the thicker o-ring to keep it all in place. Worked a treat.
Bonus was that the blue LED looked much better than the original red 12V display.
Sunday, July 14, 2019
Saturday, July 13, 2019
Red: Filthy Rich
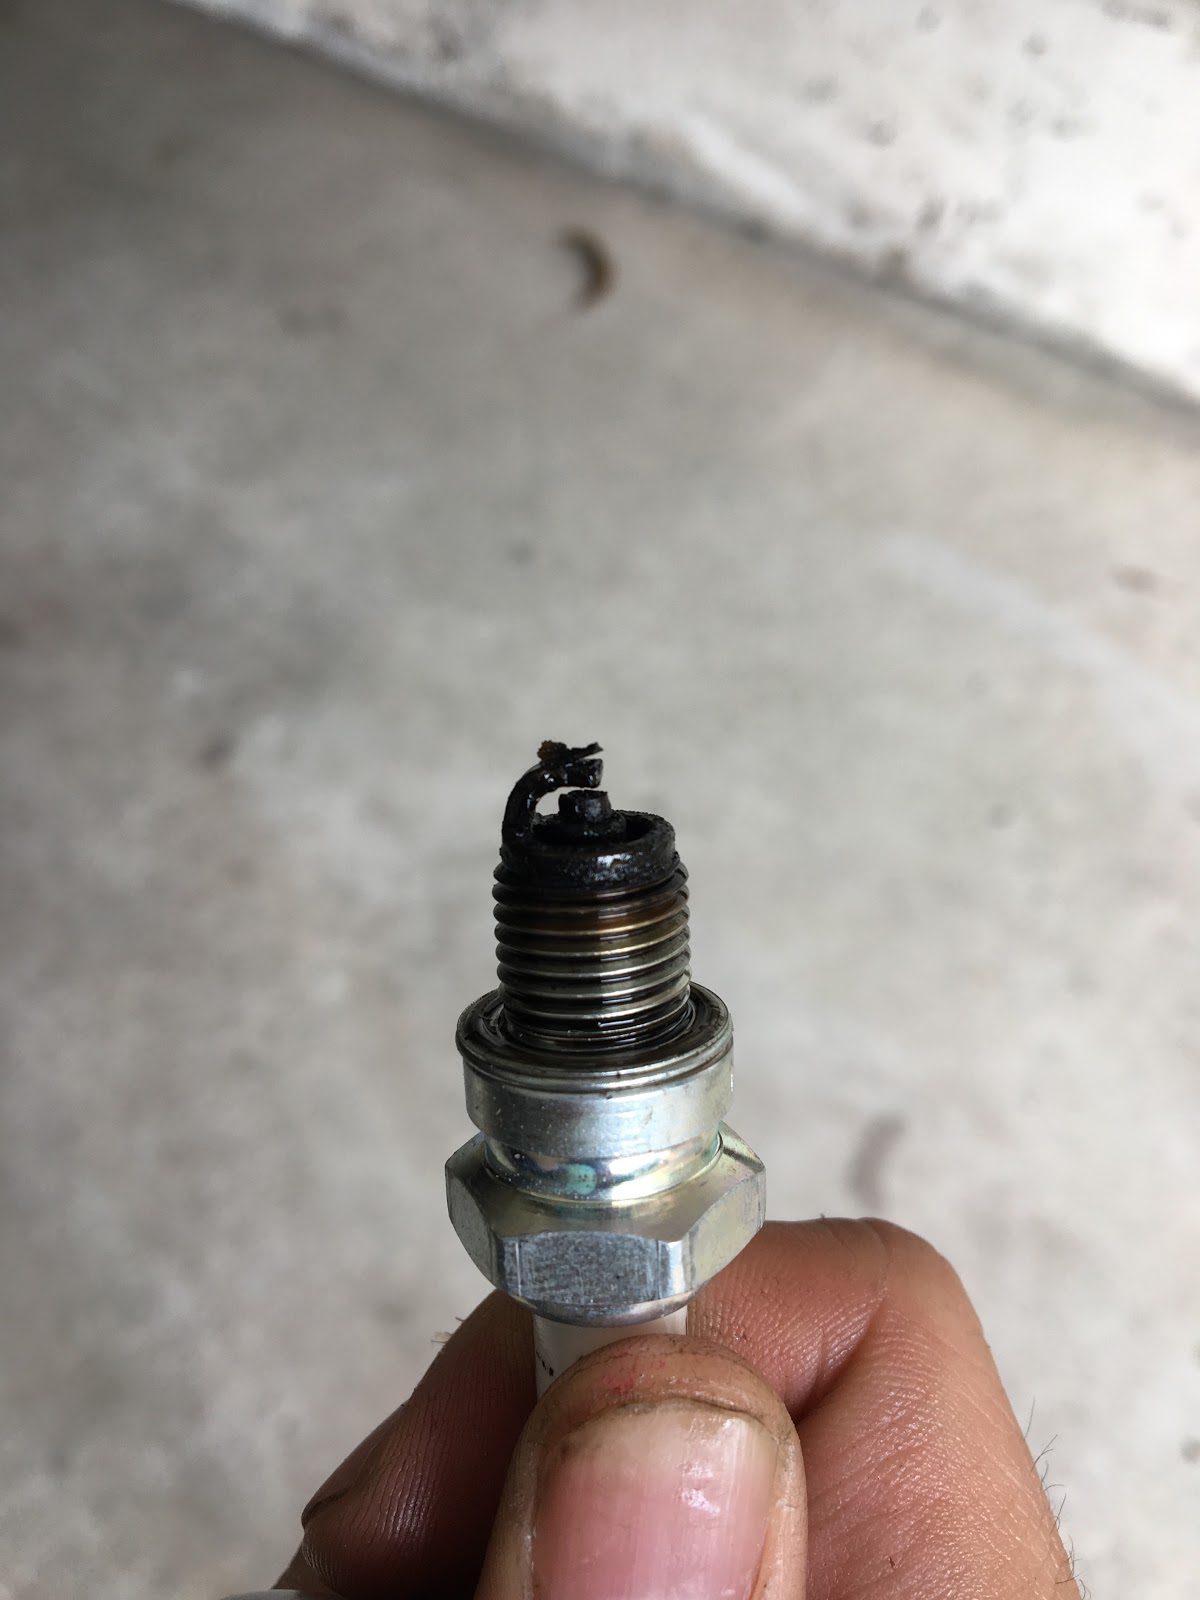
Felt like the starting issues were timing related, so checked static timing. But got a big surprise when I pulled the plug out. It was totally caked with dry, crusty residue, which seems to follow the needle being set from second highest.
So first, checked the timing and as expected, it was off (retarded). Set that to the timing mark.
Replaced the plug with a brand new D6HA.
Then dialed the rear brake pedal way in. Also pulled the brake switch wire down much farther and raised the switch itself so that the brake light was coming on nice and early.
Finally, added the grey electrical shroud to the rear wires.
So first, checked the timing and as expected, it was off (retarded). Set that to the timing mark.
Replaced the plug with a brand new D6HA.
Then dialed the rear brake pedal way in. Also pulled the brake switch wire down much farther and raised the switch itself so that the brake light was coming on nice and early.
Finally, added the grey electrical shroud to the rear wires.
Labels:
odometer,
spark plug
Friday, July 12, 2019
Monkey Motor: Shift Drum Woes
After assembling and reassembling several times, found that the whole transmission would sometimes lock up. Slowly chased it down to the top fork on the shift drum seemingly hitting a rough spot in the channel and getting a bit rough, which seemed to lead to the entire tranny locking.
But as these were the "pin" type drum forks, there was really no good way to get that damn pin out. Yahoo group no help on this one, either.
Tried sanding the channel as much as I could and stopped short of busting out the Dremel.
But then as I was playing around, I ended up removing the retaining clip, moving the fork back and forth quite a bit, then replacing the pin. And viola, suddenly the binding was gone. I think that by removing the retaining clip it allowed the pin to shift in place a bit so that it wasn't binding. Theoretically...
But in the end, was worried that it may not really have solved the problem permanently, so decided to swap it for the drum that was in the Model Motor, which had a smooth action despite having a few rust spots here and there.
That seemed to solve the shift issue, but was also finding that when I tightened down the case screws, the tranny would freeze in place from pressure.
After a long process of elimination, realized two things.
One, you need the gasket in there to account for a critical millimeter or two.
Second, the case must close flush by hand first. If you're closing any gap at all using the screws, then it's binding on something. Usually jiggling it a bit will help it close up.
As always, can't forget the 3 thrust washers: mainshaft, countershaft, and kickstart.
But as these were the "pin" type drum forks, there was really no good way to get that damn pin out. Yahoo group no help on this one, either.
Tried sanding the channel as much as I could and stopped short of busting out the Dremel.
But then as I was playing around, I ended up removing the retaining clip, moving the fork back and forth quite a bit, then replacing the pin. And viola, suddenly the binding was gone. I think that by removing the retaining clip it allowed the pin to shift in place a bit so that it wasn't binding. Theoretically...
But in the end, was worried that it may not really have solved the problem permanently, so decided to swap it for the drum that was in the Model Motor, which had a smooth action despite having a few rust spots here and there.
That seemed to solve the shift issue, but was also finding that when I tightened down the case screws, the tranny would freeze in place from pressure.
After a long process of elimination, realized two things.
One, you need the gasket in there to account for a critical millimeter or two.
Second, the case must close flush by hand first. If you're closing any gap at all using the screws, then it's binding on something. Usually jiggling it a bit will help it close up.
As always, can't forget the 3 thrust washers: mainshaft, countershaft, and kickstart.
Labels:
Monkey Motor Build,
transmission
Monday, July 8, 2019
Monkey Motor: Internals
Started on the motor proper by installing new bearings. Though I had gotten the sealed 6004 by mistake, but figured I'd drop it in for now just so I could continue working. The 6204 was correct and went in easy.
But went to install the mainshaft and it simply wouldn't fit in the recess. Closer examination showed there was some damage to it and the lip had sort of "curled" in a bit. Unsure of the right way to fix, but ended up just sanding the edge down. Didn't take much and was able to insert the shaft and it turned freely.
Close call, as that would have obviously rendered the case useless if it had been worse.
But went to install the mainshaft and it simply wouldn't fit in the recess. Closer examination showed there was some damage to it and the lip had sort of "curled" in a bit. Unsure of the right way to fix, but ended up just sanding the edge down. Didn't take much and was able to insert the shaft and it turned freely.
Close call, as that would have obviously rendered the case useless if it had been worse.
Labels:
Monkey Motor Build
Saturday, July 6, 2019
Monkey Motor: Starting
Started work on the Monkey Motor. Scraped gaskets using the new Motion Pro scraper tool, which worked pretty well. Fitted the crank.
Labels:
gaskets,
Monkey Motor Build
Friday, July 5, 2019
Garage: Organization Day, Unbox New Frames
Unboxed the two new frames, the black and "turquoise" (?) one.
Realized that along with the white, I know have one of each of the three versions sitting naked in the garage.
Turquoise frame is in fantastic shape. Super, super clean.
Realized that along with the white, I know have one of each of the three versions sitting naked in the garage.
Turquoise frame is in fantastic shape. Super, super clean.
Wednesday, July 3, 2019
Red: Horn Swap and Speedo On
Installed the new $3.79 thumb screw from Ace using a double nut to set the length. One of those easy fixes that couldn't have worked out any better. I like the look, too...
Then checked into the problem of the very low horn. The odd thing is that it was low when you honked it from the button. But if you hooked it up directly to the battery it sounded fine.
Figured that somehow it wasn't getting the full 6V while on the bike, but tested the circuit and indeed the voltage was just fine. So how could it betting getting full volts while on the bike but sounding very low, and then full volts directly to the battery but sounding fine?
Made no sense. Finally just swapped Ivy's horn over as a test and it worked fine! So just something a bit off with the aftermarket horn... Have a new one on order anyway, so I'll just leave Ivy's on Red for now.
Speedo gear install was pretty straight-forward. Used the new Husky ratcheting wrenches to good effect to remove the fender. Almost made that job a pleasure versus doing it the old way.
Applied liberal amounts of moly-b to the gears.
Took it for a spin later that afternoon and it's working!
But based on that and a few subsequent rides, it looks like the ratio is going to be a bit off. What the odometer displays is less than actual. To get actual, multiply the displayed mileage by a factor of 1.4.
Then checked into the problem of the very low horn. The odd thing is that it was low when you honked it from the button. But if you hooked it up directly to the battery it sounded fine.
Figured that somehow it wasn't getting the full 6V while on the bike, but tested the circuit and indeed the voltage was just fine. So how could it betting getting full volts while on the bike but sounding very low, and then full volts directly to the battery but sounding fine?
Made no sense. Finally just swapped Ivy's horn over as a test and it worked fine! So just something a bit off with the aftermarket horn... Have a new one on order anyway, so I'll just leave Ivy's on Red for now.
Speedo gear install was pretty straight-forward. Used the new Husky ratcheting wrenches to good effect to remove the fender. Almost made that job a pleasure versus doing it the old way.
Applied liberal amounts of moly-b to the gears.
Took it for a spin later that afternoon and it's working!
But based on that and a few subsequent rides, it looks like the ratio is going to be a bit off. What the odometer displays is less than actual. To get actual, multiply the displayed mileage by a factor of 1.4.
Labels:
electrical,
horn,
speedometer
Subscribe to:
Posts (Atom)