Thought that if an air leak was the issue, then I'd swap out the intake for the one I just pulled off of Roxy.
Did that and idle seemed better, though still rough.
Moved the needle back to the middle position.

Tuesday, February 11, 2020


Monday, February 10, 2020
Roxy: Bore Size Reveal
So turns out Roxy's cylinder is a standard 50mm.
So why then did she always feel like she had a little more grunt? She seemed both heavier and torquier than Ivy. Or has it just been my imagination this whole time?
And why the breather tube on the tappet cover (as if it needed to bleed off loads of extra pressure)?


So why then did she always feel like she had a little more grunt? She seemed both heavier and torquier than Ivy. Or has it just been my imagination this whole time?
And why the breather tube on the tappet cover (as if it needed to bleed off loads of extra pressure)?


Sunday, February 9, 2020
Roxy: First Tear Down Ever
Hard to believe that after having owned Roxy for this long, still had never pulled the top end apart down to the cylinder. Was to be the big day when we finally discovered if she had a big bore or not. Would answer the question of why she seemed to have so much grunt or why she had the relief valve on the tappet.
She was a bit tough to get apart. Had to knock a few covers with the screwdriver handle to jog them loose.
Toughest was the head cover. Wouldn't budge. And for some reason, with it still on, I couldn't get the head completely off the cylinder studs.
Ended up separating it using a Philips as a wedge (as gently as possible). But once that was off, the head came off. Pulled the cylinder but left the piston.
Cylinder bore actually looked great. Still had the cross hatching. Just a narrow rim of discoloration (corrosion?) on the outside edge. Thought for sure it would be in much worse shape. But if that's the case, then why the smoke?
Started this tear down as the first step to cleaning her up and putting her into Preservation Mode.


She was a bit tough to get apart. Had to knock a few covers with the screwdriver handle to jog them loose.
Toughest was the head cover. Wouldn't budge. And for some reason, with it still on, I couldn't get the head completely off the cylinder studs.
Ended up separating it using a Philips as a wedge (as gently as possible). But once that was off, the head came off. Pulled the cylinder but left the piston.
Cylinder bore actually looked great. Still had the cross hatching. Just a narrow rim of discoloration (corrosion?) on the outside edge. Thought for sure it would be in much worse shape. But if that's the case, then why the smoke?
Started this tear down as the first step to cleaning her up and putting her into Preservation Mode.


Red: Epic Bad to Worse
Started with the easy job of swapping out the Left Cover (again). This time for a new and very clean eBay one. Went back to the cork-rubber gasket.
Then decided to swap out the Sheng Way carb #1 for the recently cleaned #2. Swapped it over, went to start and no joy. Engine would race and then die. Could not hold steady idle.
Felt like an air leak. So decided to add the missing gasket from intake to carb that had been missing this whole time. Stock gasket was a bad fit for some reason, so ended up cutting a new one from the Fel-Pro pack. After cutting one, decided to cut a second and put it on both sides of the insulator.
Tried it again and no joy.
Removed the intake from the head to check the gasket there - and there wasn't one! Could have sworn it had one all this time. Thought that was bound to be the solve, but after adding a stock gasket, it was the same issue.
So moved the needle down to second from bottom but still very rough idle.


Then decided to swap out the Sheng Way carb #1 for the recently cleaned #2. Swapped it over, went to start and no joy. Engine would race and then die. Could not hold steady idle.
Felt like an air leak. So decided to add the missing gasket from intake to carb that had been missing this whole time. Stock gasket was a bad fit for some reason, so ended up cutting a new one from the Fel-Pro pack. After cutting one, decided to cut a second and put it on both sides of the insulator.
Tried it again and no joy.
Removed the intake from the head to check the gasket there - and there wasn't one! Could have sworn it had one all this time. Thought that was bound to be the solve, but after adding a stock gasket, it was the same issue.
So moved the needle down to second from bottom but still very rough idle.


Saturday, February 1, 2020
Red: Epic, Forks and Leaks
Had put off these bigger jobs for a long time...
Started by draining the oil to take another look at the left cover oil leak.
Saw that there was definitely old gasket on the cover, so scraped some off and then also used 2000 grit and with cover flat on plexiglass tried to smooth it down evenly.
Went back to the regular paper gasket to get a "default" setting. The cork-rubber gasket seemed to be holding up fine, though.
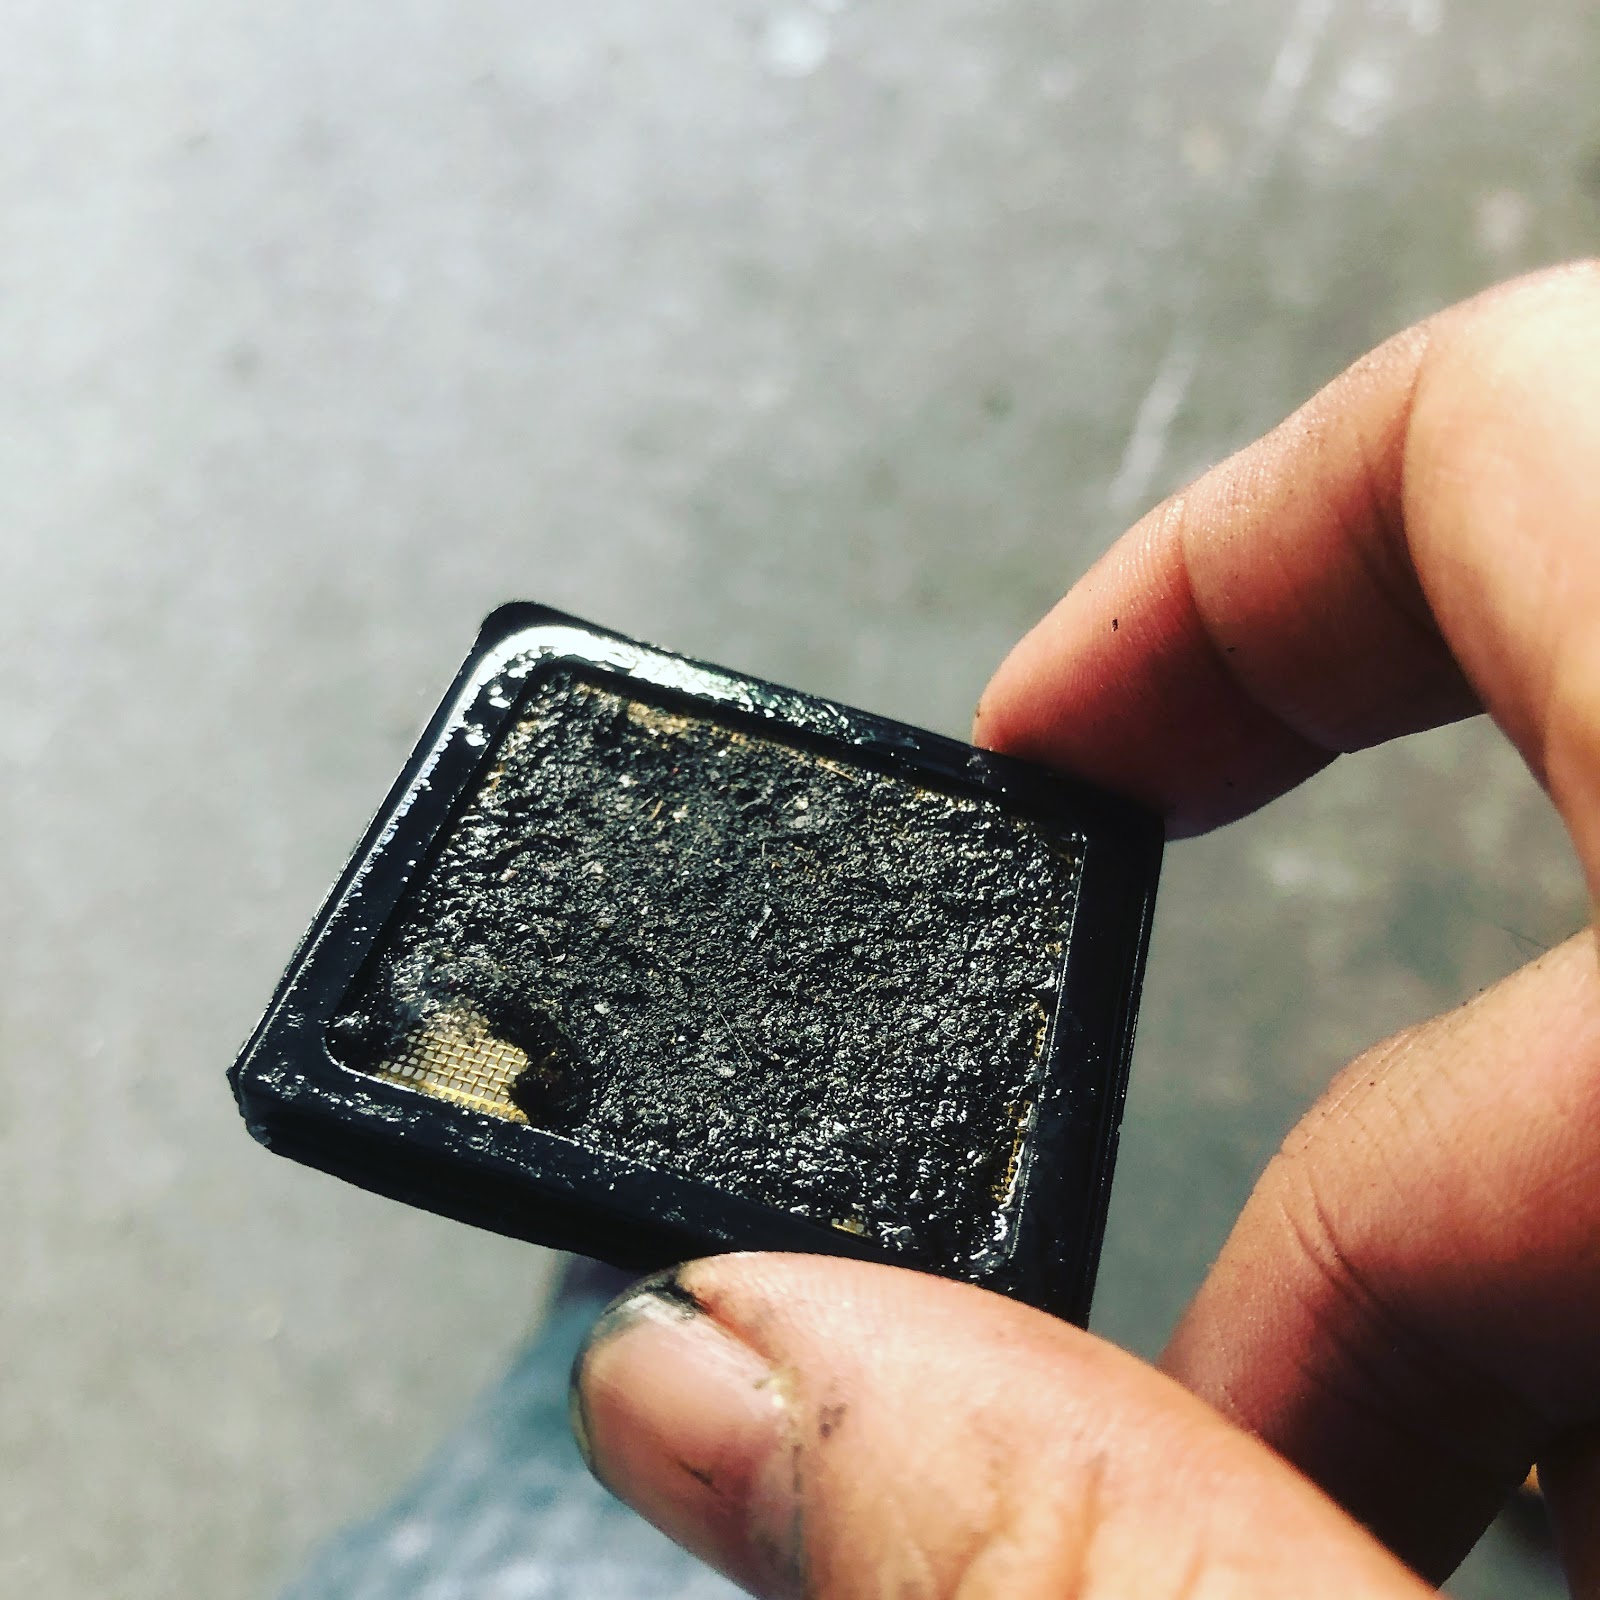
After that, swapped out the clutch. Screen filter was VERY dirty. Pretty much blocked solid. Some sludge in the clutch basket trap (clutch got swapped anyway).
All that took three hours.
Then on to the forks. Pulled just the right one and removed both of the ACE o-rings. With wheel back on, the fork was spurting oil on every compression.
Put the ACE o-rings back but put some grease around them to try to prevent the forks from sticking.
EDIT (next day test ride results): Unfortunately, still getting a small leak from under the left cover, but now a BIG leak coming out the top. Did sanding the bottom introduce a warp at the top?!
Right fork still leaking but they don't stick anymore!
Clutch much better now. No more "heavy" third kick. Seems to start much easier, too. Also ended up dialing the throttle screw way down.


Started by draining the oil to take another look at the left cover oil leak.
Saw that there was definitely old gasket on the cover, so scraped some off and then also used 2000 grit and with cover flat on plexiglass tried to smooth it down evenly.
Went back to the regular paper gasket to get a "default" setting. The cork-rubber gasket seemed to be holding up fine, though.
After that, swapped out the clutch. Screen filter was VERY dirty. Pretty much blocked solid. Some sludge in the clutch basket trap (clutch got swapped anyway).
All that took three hours.
Then on to the forks. Pulled just the right one and removed both of the ACE o-rings. With wheel back on, the fork was spurting oil on every compression.
Put the ACE o-rings back but put some grease around them to try to prevent the forks from sticking.
EDIT (next day test ride results): Unfortunately, still getting a small leak from under the left cover, but now a BIG leak coming out the top. Did sanding the bottom introduce a warp at the top?!
Right fork still leaking but they don't stick anymore!
Clutch much better now. No more "heavy" third kick. Seems to start much easier, too. Also ended up dialing the throttle screw way down.



Saturday, January 25, 2020
Red: 7.5 Volts
Realized that if I was short on voltage with the engine running and the lights on, then why not add a couple extra? Seemed like the low horn volume when running was simply due to the low volts.
So rigged up an extra D battery to clip into the existing harness. Tested ok, so then soldered everything together.
Test run showed a much better horn volume, though still not super loud...


So rigged up an extra D battery to clip into the existing harness. Tested ok, so then soldered everything together.
Test run showed a much better horn volume, though still not super loud...


Saturday, January 4, 2020
Red: Close Call
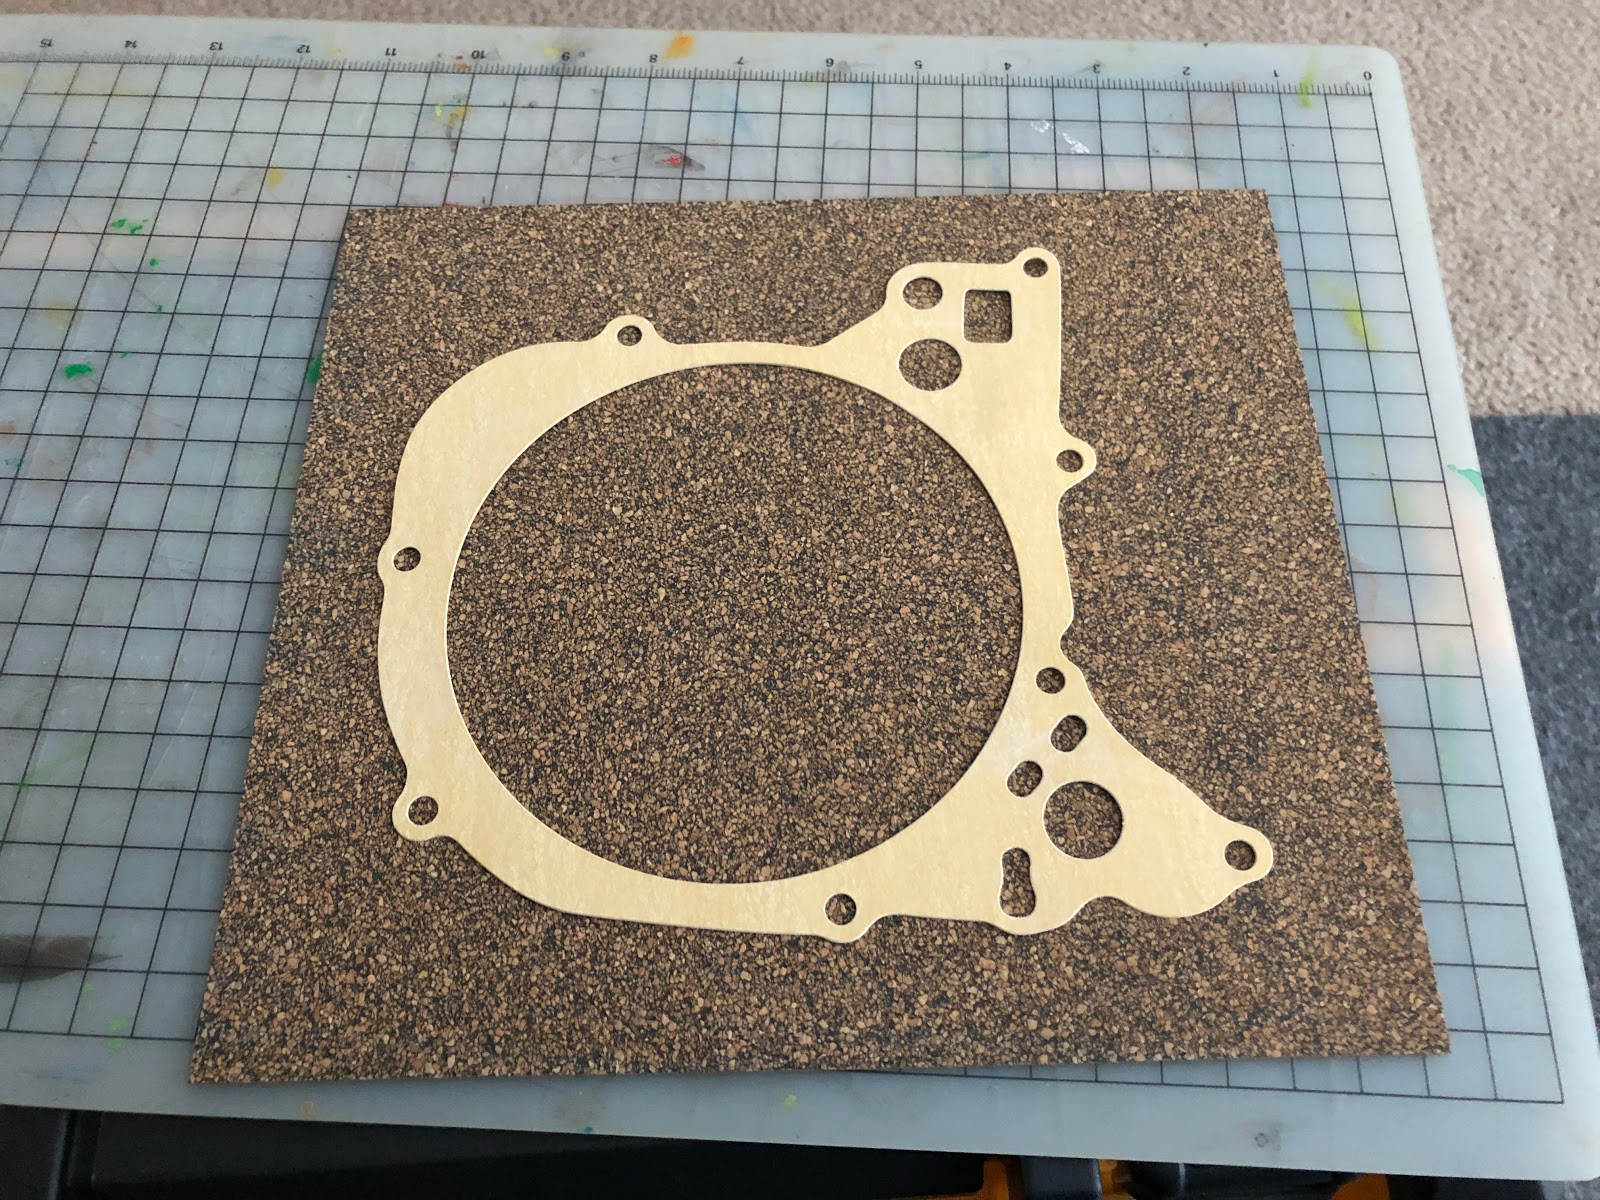
Cut a gasket for the left crankcase cover using the Fel-Pro cork-rubber 1/16" material. A bit fiddly with all the holes, but actually not as much trouble as I would have thought.
Drained the oil and installed it, but in doing so discovered the chain was covered with small metal filings!!
Both bolts on the front sprocket were so loose they were wobbling in place!
That then caused the sprocket itself to be loose and grind. Luckily it seems like the teeth themselves where ok. The grinding took place lower down.
But had to then completely remove the chain for cleaning. Brushed and scrubbed it and hosed it down repeatedly until all the shavings were gone.
Put LocTite on the bolts when re-installing as well. Lubed the chain as usual.
Close call!


Drained the oil and installed it, but in doing so discovered the chain was covered with small metal filings!!
Both bolts on the front sprocket were so loose they were wobbling in place!
That then caused the sprocket itself to be loose and grind. Luckily it seems like the teeth themselves where ok. The grinding took place lower down.
But had to then completely remove the chain for cleaning. Brushed and scrubbed it and hosed it down repeatedly until all the shavings were gone.
Put LocTite on the bolts when re-installing as well. Lubed the chain as usual.
Close call!


Subscribe to:
Posts (Atom)